Aldridge, Inc.

GEORGE WEBB RESTAURANTS

Server & Cook Training Manual

Learn together. Practice the company method. Keep this book close throughout your employment.

Your reference book

Follow your personal training guide for today’s reading, activities and sign-offs. This manual brings the procedures together in one place. Reading a section is followed by discussion, practice and observation.

CHAPTER 1

Getting started

1 section

SECTION 1.1

Welcome to your training

A good start, together

You are learning both cooking and serving. Your trainer will demonstrate the company method, explain why it matters, and give you time to practice. You are expected to ask questions, use this manual and follow the procedures.

Your daily guide and this manual

Your personal training portal tells you what to do each day. This manual is the reference book behind that guide. You can keep using it after training whenever you need to check how a job is done.

  1. Meet: Review today’s goal and yesterday’s questions with your trainer.
  2. Watch and try: See the method demonstrated, then practice with coaching.
  3. Read and study: Take the assigned reading period. Pause and explain the important points in your own words.
  4. Show what you know: Complete the assigned questions, role-play, verbal review or observed task.
  5. Check in: Discuss progress, save your participation and feedback, and agree on the next practice.

Practice makes the difference

Reading is one part of training. Knowing the words and being able to do the work are different achievements. Your trainer records both, and your manager reviews readiness before training is complete. If a task does not arise during a shift, it stays visible for a planned opportunity.

Use the company method

Experience elsewhere can be useful, but this restaurant has its own procedures. Look them up rather than substituting a personal method. Ask your trainer or manager when an instruction or a piece of equipment is unclear.

Small challenges, real progress

Try explaining a procedure back without looking, spotting a mistake in your trainer’s example, or finding the right recipe before a batch begins. These are opportunities to learn together, not a reason to hide uncertainty.

CHAPTER 2

Learning the cook line

4 sections

SECTION 2.1

Cook fundamentals

Cooking Process

Count Up

Before putting food on the griddle, count everything needed for the orders you are preparing: hamburger patties, fries, hashbrowns, sausage, bacon and other items. Bring out what you need before cooking begins.

Set Up

After counting up, set up. Decide where each item will cook and where it will go when finished. Put plates on the board, bun tops on the griddle and bun bottoms on the plates before putting the food on the griddle.

Timing

Time the items so each meal finishes together. Hashbrowns, omelets and grilled sandwiches generally take longer than hamburgers, fries or sausage. Start the longer-cooking items first, then add the quicker items.

Communicate

When two people work the cook line, communicate throughout the order. The runner helps count up and set up while the cook checks tickets and cooks. Call out what is needed, such as “four hashbrowns, two bacon and one sausage.” As eggs reach the plates, identify their sides: “hashbrowns for this over-easy order; sausage for this over-medium order.”

Handling the Rush

During a rush, work a manageable group of tickets—four, six or eight—rather than trying to cook every incoming order at once. Count up and set up that group. As it finishes, prepare for the next group.

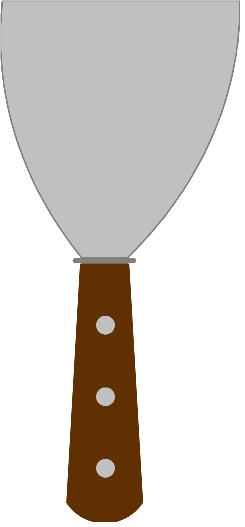
Station ReadinessImage of Scraper

Before leaving the station after a group of orders, reset it. Scrape the griddle. Wipe the scraper inside the folded grill pad towel, then wipe the griddle with the bottom of that towel. Put tools on the board, never in the griddle trough. Wipe the board with a sanitized wiping towel. You are now ready for the next group.

Wiping removes excess grease and crumbs so the next order starts on a smooth cooking surface.

Grill Pad TowelImage of Important Post-It

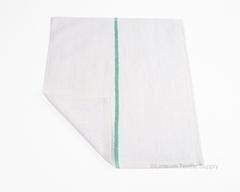
Keep the grill pad towel folded in half. Wipe tools inside the fold and use the bottom to wipe the griddle. Do not wipe tools across the top: the top should stay clean and white. Never use the grill pad towel on the grill board. The board is a food-contact surface and requires a sanitized wiping towel.

George Webb Hamburger

There is only one way to make a George Webb hamburger. Here's how:

  1. Place the bun top on the griddle first so it has time to warm.
  2. At the same time, place the bun bottom on the board or plate.
  3. Bring out the patty, lettuce, toppings, mayonnaise and other needed ingredients.
  4. Put the patty on the griddle. For fried onions, take onion pieces with some water from the onion can and put them on top of the meat. Cook onions in the meat juices; do not cook them separately or with butter.
  5. Flip the patty only once, after the underside turns grayish brown and before it shrinks. Never press, pat or squeeze out the juices. For a cheeseburger, add the cheese now and squirt a little water to help it melt.
  6. When cooked, lift the bun top onto the patty with the turner. Lift both together and place them on the bun bottom.

Again!

Image of Important Post-It
  • Place the bun top on the grill first
  • Place the onions on top of the patty, not on the side of the meat
  • Never flip the patties more than once, and never press, pat, or squeeze the patties!
  • When removing the patty, scoop the bun top and place it on the patty, then scoop both and place onto bun bottom.

Quiz

What's the first step to making a hamburger?

Answer:  Bun top on the grill first!

Storage/Keeping of Fresh Sliced Onions

Image of Fresh Sliced Onions and Onion Can

Keep two stainless steel onion cans filled with onions and topped with water: one at the grill board and one in the refrigerator. Periodically drain the water from the can in use and replace it with fresh water.

Egg Preparation

Over EggsImage of Over Eggs

  • 2 eggs
  • medium heat
  • teaspoon butter

Melt the butter over medium heat. Carefully add the eggs. When they are about halfway cooked, flip them in the pan and finish the second side to the requested doneness. If needed, flip them back to present the better-looking side.

Doneness:

  • Easy is very runny yolk and slightly runny white around the yolk
  • Medium is runny yolk but white is solid
  • Hard is yolk cooked completely through

Scrambled Eggs Image of Scrambled Eggs

  • 2 eggs
  • medium heat
  • teaspoon butter

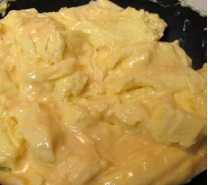
Crack two eggs into a mixing bowl. Add one tablespoon of water and beat with a fork until the whites and yolks are thoroughly mixed. Melt the butter over medium heat and pour the mixture directly onto it. When the edges begin to set, stir with the plastic fork. Continue to the requested doneness and remove the eggs from the pan immediately.

Doneness:

  • EASY is very soft
  • MEDIUM is moist
  • HARD is dry

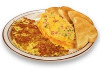
OmeletsImage of Omelet

  • 2 eggs
  • low heat
  • teaspoon butter

Melt the butter over low heat. Prepare the eggs as for scrambled eggs and add the portion of omelet mix, such as Denver, mushroom or ham. Pour the mixture onto the butter, cover the pan and cook slowly over low flame. Do not brown the omelet. Flip it with the nylon turner or in the pan, then cook the second side through. Flip back to present the better-looking side. Add one portion of shredded cheddar cheese before folding, then fold and slide onto the serving plate.

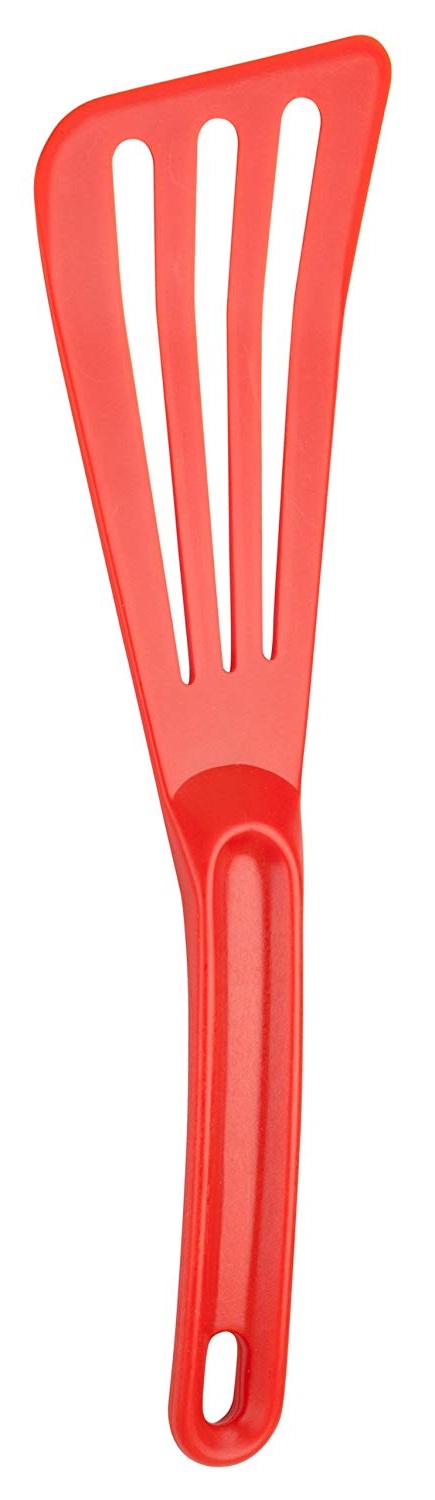
Flipping the OmeletImage of Red Turner

To flip an omelet with the nylon turner, slide the turner underneath and raise the omelet enough to let uncooked egg run off. This helps keep the omelet lighter. Then turn it over.

Important - Don't Brown the Omelets!

Image of Flame Down

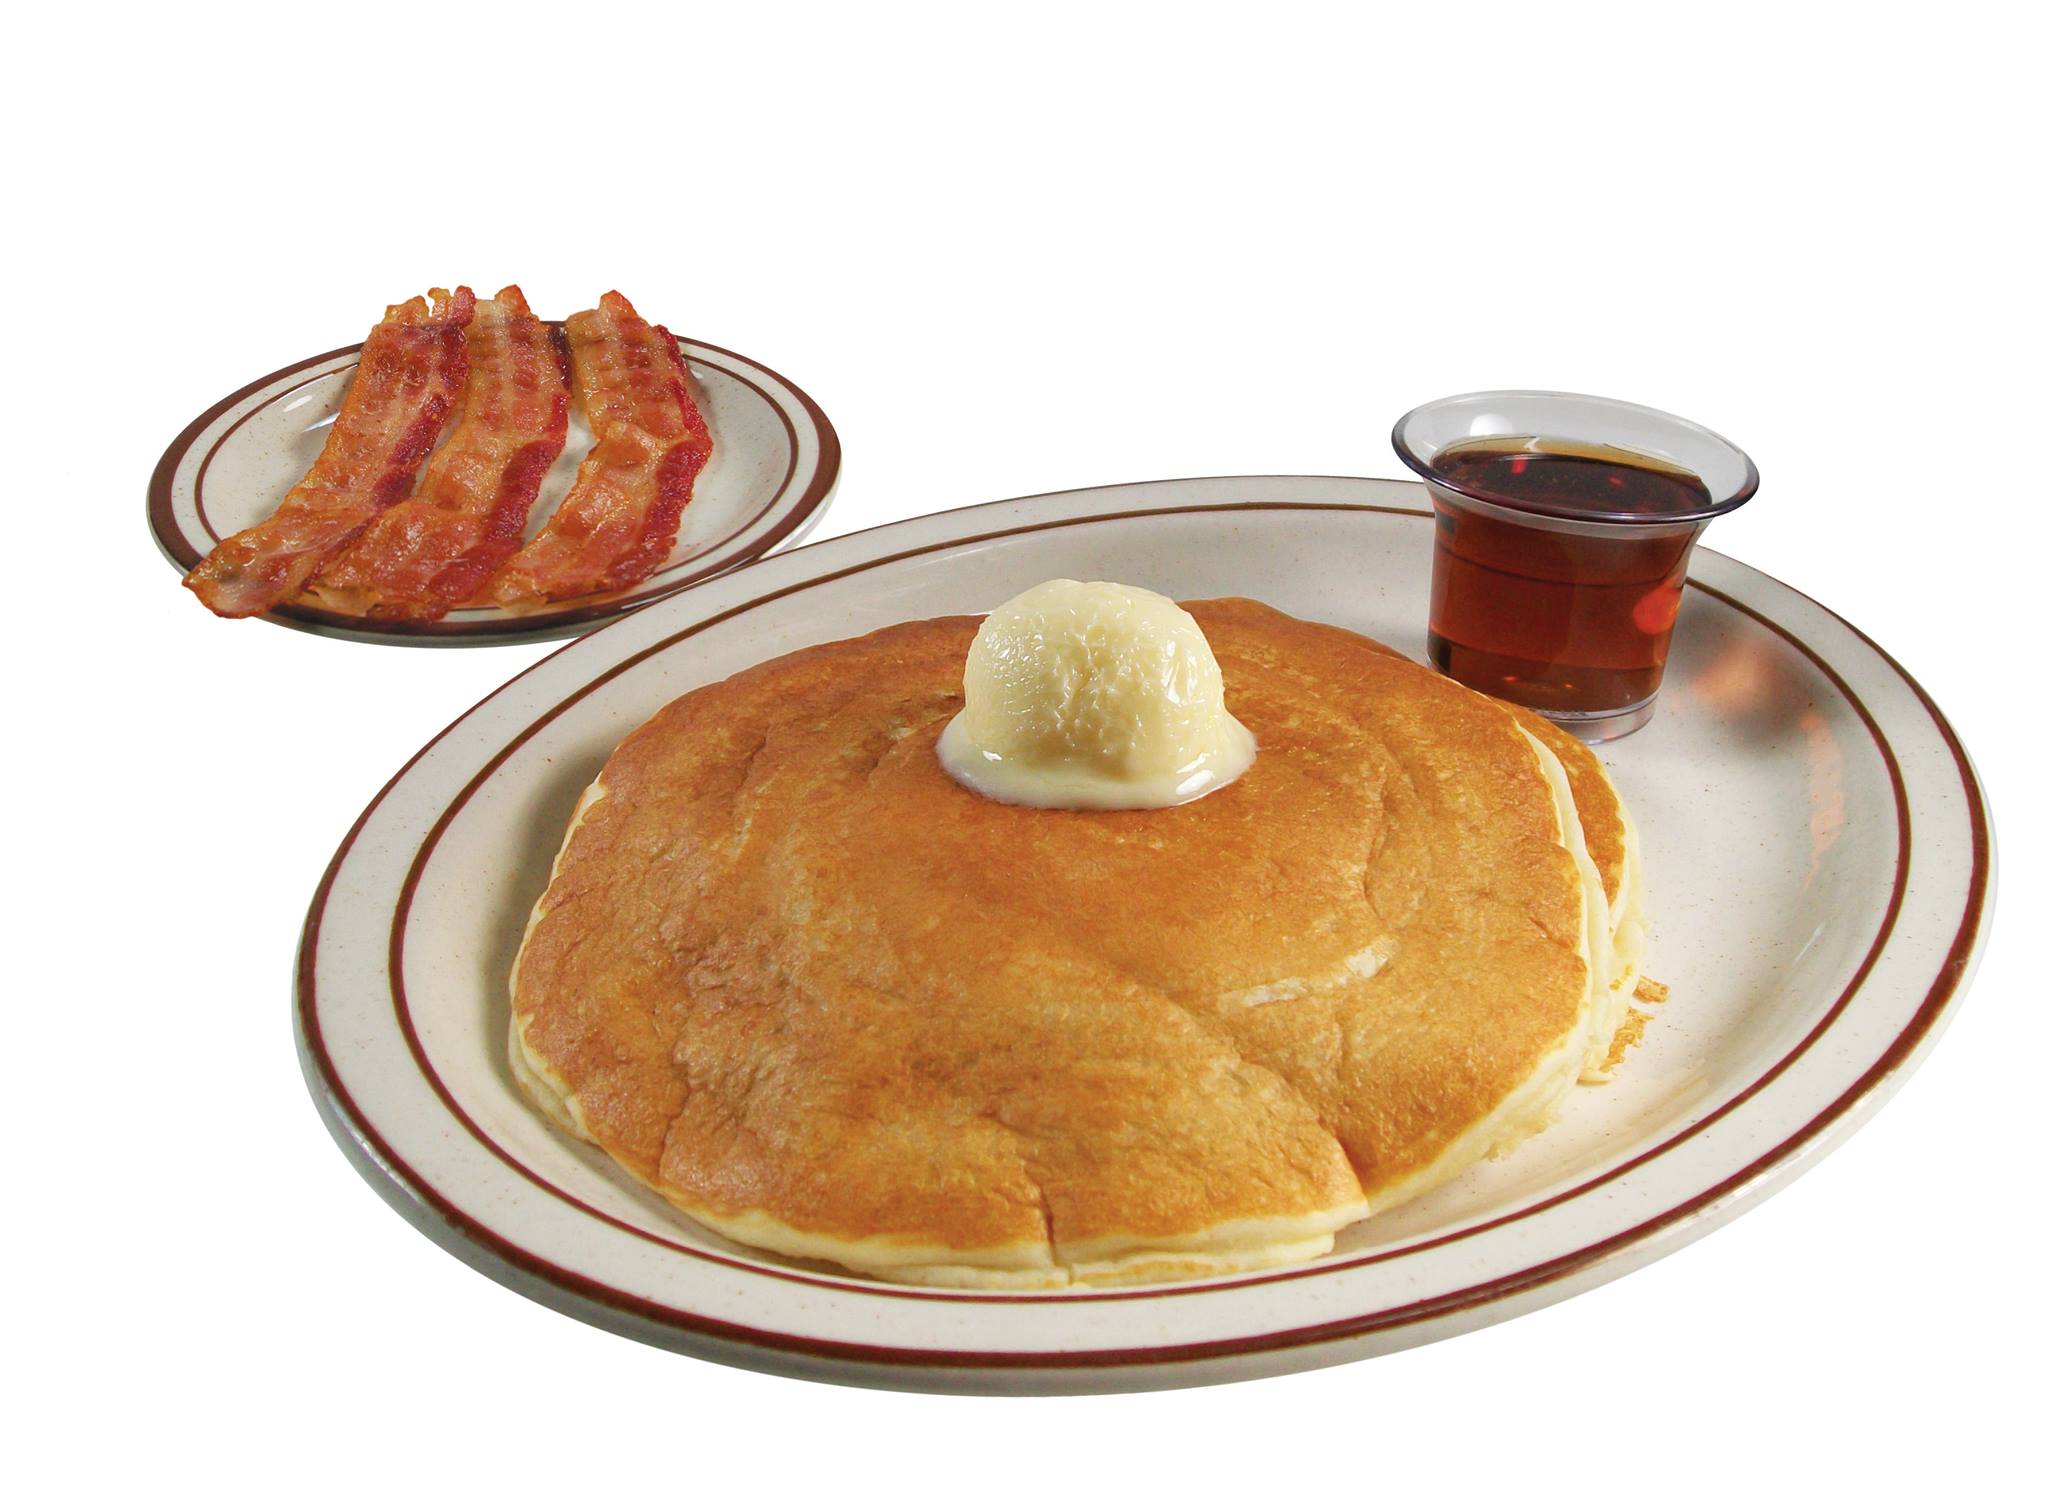
Wheatcakes Image of Wheatcakes

Image of Scraper Keys:

  • A freshly scraped and wiped off grill
  • 1-1/2 spoonfuls of batter per cake
  • To make nice round cakes, pour straight from above and high (about 12" or more). Don't try and make the circle yourself.
  • Flip over just as bubbles begin to pop
  • If there is a little splash of batter that pops out after flipping, trim that off with the grill scraper.

Instructions:

Scrape and wipe the griddle before each batch; remove food debris and excess oil. Use the large spoon to pour 1-1/2 spoonfuls of batter per cake. When bubbles begin to pop, check the underside. Flip when golden brown. Trim spilled batter with the turner edge or scraper. Cook the second side just through, then plate the cakes in an overlapping, shingle-style stack.


Cutting Toast and Sandwiches

Image of Angle Cut

Quick-SellsImage of Quick Sell

A quick-sell is a small carryout order, such as a couple of burgers, that arrives while dine-in seats and the cook line are busy.

Watch for these small carryout orders. Move quick-sells ahead and complete them promptly; these customers expect a shorter wait than seated dine-in customers.


Every Shift Has a "Runner"Runner Image

The runner is a server who helps the cook, primarily at the egg stove and toaster. The runner helps coordinate and move orders through the cook line.


Grill Temperature

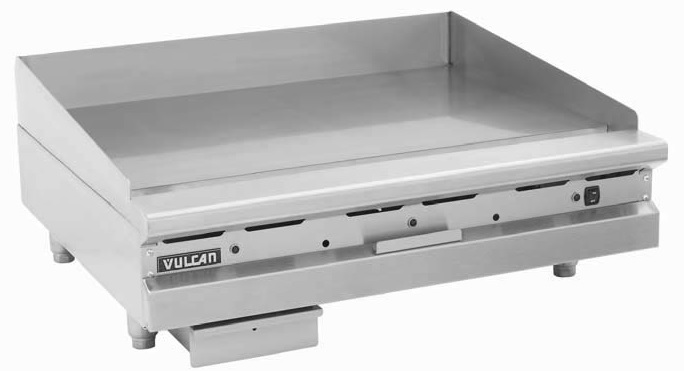
Image of Griddle

If one side of the griddle is too hot or too cool, make a slight adjustment.

  • The hamburger and meats side of the grill should be 350
  • The wheatcakes and bun tops side of the grill should be 375

Learn how food cooks at the correct setting. An experienced cook notices changes in cooking speed as well as checking the dial position.

Report any problem controlling the griddle temperature to management immediately.


Running Low of Food or Supplies?Image of Phone

Our policy is to keep food and supplies available so we do not have to tell customers we are out of an item.

Call the manager immediately when you are running low or have run out.

If the manager does not respond, call Tom Aldridge at (262) 893-1124.


The Last Half Hour (of the Shift, Service Must Continue Uninterrupted)

Customers expect service to continue during shift changes and cleanup.

Plan cleanup around service so orders keep moving.

Yet here at GW we've had:

  • cooks telling servers "I'm cleaning the grill, don't send any orders back", or something to that effect -or-.
  • servers telling customers "sorry I've cashiered out need to wait until the next shift"

Customers aren't going to wait for that!

Clean the cook line, including the griddle, between orders. Work quickly and return the griddle to service promptly. Do not announce that the kitchen is closed for cleaning or tell servers to stop sending orders.


SECTION 2.2

Egg flipping in the pan

Instead of relying on a spatula or flipping with the pan lid, we learn to gracefully flip the eggs in the pan. It takes some practice, but once you get the hang of it, it's an exhilarating experience, and it's much faster. It's like learning to ride a bike; after a few falls and scrapes, suddenly you're gliding effortlessly with a grin on your face, thinking to yourself, "this is easy and fun!"

The Secret

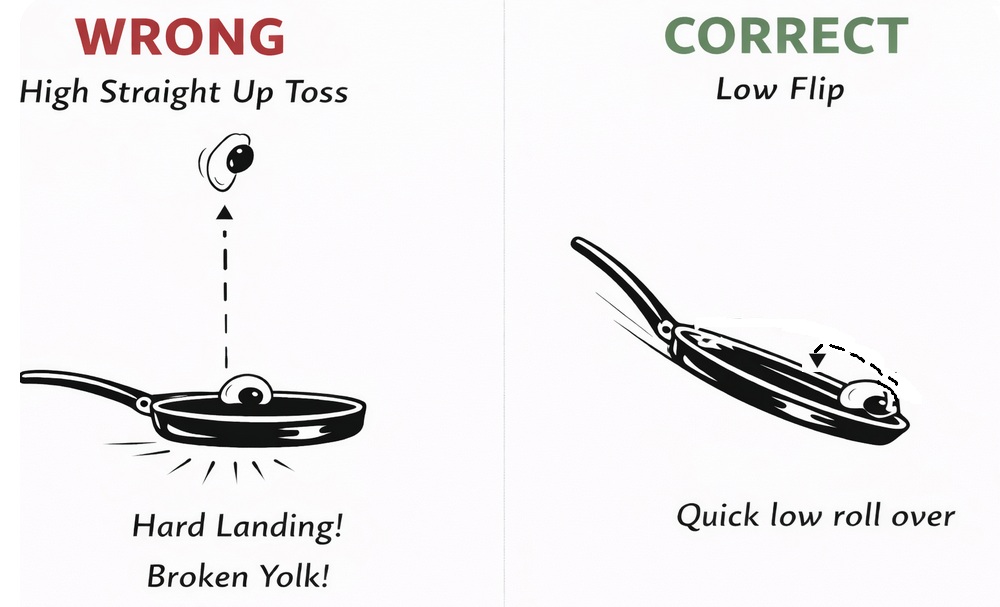
The secret to flipping eggs is to keep the pan flat and avoid tossing the egg straight up in the air. Gently tilt the pan handle dropping the egg toward the back edge of the pan, then pull the egg back over with a quick wrist motion. The egg should roll over low and land flat in the middle of the pan.

Wrong vs. Correct Motion

Study this graphic carefully. The wrong motion is a high straight-up toss. The correct motion is a quick low roll-over back into the pan.

Wrong vs. Correct Egg Flipping Motion

Practice- It's the Only Way

  1. Practice with toast first.  Toast a piece of bread and spend several minutes flipping it in the pan until you can flip the toast from one side to the other without it flying out of the pan.

  2. Next, Practice with one (1) egg.  Melt a teaspoon of butter in the pan over a medium flame. Crack one egg into the pan without breaking the yolk.

    Watch for:
    • Clean crack
    • No shell fragments
    • Yolk intact

  3. Step 2 - Slide Test.  Gently shake the pan so the egg slides freely.

    This shows:
    • Proper heat
    • Proper amount of butter
    • Pan control
    Rule: Egg must slide before flipping.

  4. Step 3 - Flip the Egg.  Flip the egg once using the pan.

    Requirements:
    • Keep pan on stove, tilt a bit so egg falls against outer edge.
    • Use wrist motion to roll the egg over
    • Egg rises only an inch or so
    • Egg lands flat
    • No broken yolk

  5. Practice with two (2) eggs after mastering one.  After you can consistently flip one egg cleanly, move on to two eggs. Use the same method: enough butter, proper heat, slide test first, then a quick low roll-over motion.

  6. Practice, practice, practice.  Go ahead and break some yolks. The only way to learn it is trial and error.

  7. Practice every day. It's better to break a few eggs now while learning than later on customer orders.

Videos that help

Watch these videos. The concepts really help.

SECTION 2.3

Egg pans: care and use

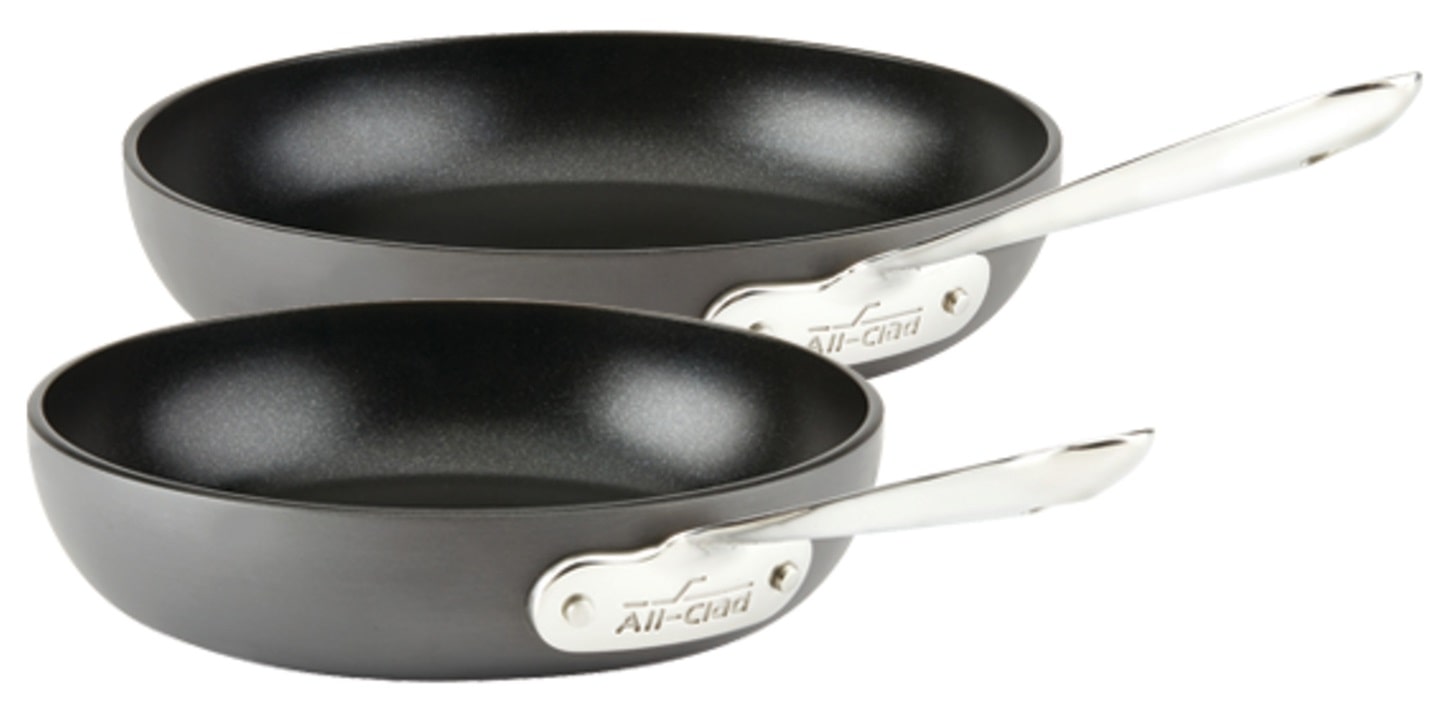
Egg pansCorrect heating, enough butter or oil, and careful cleaning help prevent sticking and keep the egg pans in good condition.

Prepare the pan and cook

  1. Fully heat the pan before adding butter or oil.
  2. Let the butter or oil sizzle before adding the eggs.
  3. Slide the eggs directly into the pool of hot butter or oil, rather than onto an unoiled part of the pan.
  4. After each use, wipe out food scraps with a napkin. Bits left behind can cause the next eggs to stick.

Use the right utensils

  • Use the plastic fork for scrambled eggs.
  • Use the red plastic or nylon turner when needed to flip an omelet.
  • Do not use metal utensils on the cooking surface or bang a butter knife against the pan.

Clean and store with care

  • Let the pan cool before cleaning. Do not plunge a hot pan into cold water.
  • Handwash with warm, soapy water. Do not put egg pans in the dishwasher.
  • Use the metal scrubber on the underside only, not the cooking surface.
  • Do not stack pans on top of one another.

SECTION 2.4

Kitchen station procedures

Start with the Kitchen Tablet

At the start of your shift, read the Kitchen Tablet's current duty list with your trainer. Check the day, shift and “When” column. The tablet connects the work you do between orders to the detailed company procedure: open the red task name when you need the method, then return to serving customers.

Begin the day's deep clean and thawing checks early. Start your assigned prep and keep working on it between orders; servers help while watching their customers. Keep stock ready throughout the shift, refresh the cleaning and sanitizing buckets on schedule, and plan the late-shift kitchen clean-up around uninterrupted service. Finish with dishes, waste removal and a clear handoff of anything still needed.

Keep one or two pans of steaks thawing, based on how busy your store or shift is. Follow your manager’s direction.

The preview below lets you study each weekday and shift without recording completion. Use the operational tablet only when doing the actual work, and record only tasks you have completed.

Explore the kitchen shift duties

Training reference only. This view cannot submit shift duties.

Open full-size reference

Keep soups ready throughout the day

Chili and chicken soup are always-available products. Every shift checks their condition and quantity, maintains them and gets more ready as needed. Do not leave the next shift to discover that a standard product has run out.

The additional soups follow the daily schedule, and first shift makes them. Every shift checks and maintains those soups, adding a little hot water as needed. When an additional soup runs out, turn off and unplug its heater, then remove and wash the pot. Coordinate with the server so the soup station and kitchen stay ready together.

Find the reference while you work

Use Menu Reference first to identify the item and its accompaniments. Then use Carryout Packaging to send that item out correctly. Open Batch Recipes when making soups, chili, wheatcake batter or French-toast batter. These are working references on the tablet, not recipes to memorize once and stop checking.

1. Menu Reference

Training reference only. This view cannot submit shift duties.

Open full-size reference

2. Carryout Packaging

Training reference only. This view cannot submit shift duties.

Open full-size reference

3. Batch Recipes

Training reference only. This view cannot submit shift duties.

Open full-size reference

Red & Green Buckets

We need to keep washed and sanitized terry towels ready for use as follows.

Soapy WaterImage of Soapy Bucket

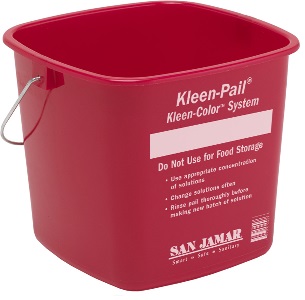
Fill the green Kleen-Pail with soapy water from the dispenser. Hand wash the soiled towels by swishing with your hands.

Bleach WaterImage of Sanitizer Bucket

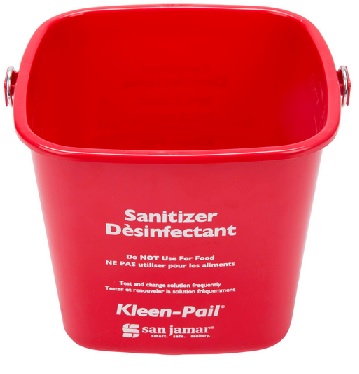
Fill the red Kleen-Pail with bleach and water from the dispenser. Soak the towels in the bleach water to keep them white and to sanitize.

Second-shift fryer work

Fryer filtering and oil changing are second-shift assignments, distinct from the station-readiness basics every shift learns. The source insert calls for daily filtering, with the griddle-side fryer changed on Tuesday and the other fryer on Friday. Use the current duty assignment and the approved detailed method; do not substitute this overview for equipment instruction.

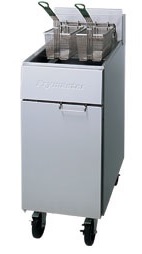
Fryer Oil FilteringImage of Fryer

Caution - Allow oil to cool to 160 degrees and wear Neoprene Safety Gloves

Image of Fryer Filtering Image of Neoprene Safety Gloves
  1. Open the fryer door and turn the gas control knob to the "PILOT" position. (Some fryers have an on/off)
  2. Caution! Allow the fryer oil to cool to 160 degrees before continuing with this procedure. Test the temperature with the stemmed food thermometer.
  3. Wear hot mitts!
  4. Screw the drainpipe into the valve fitting
  5. Position the large fryer oil pot into place
  6. Position filter cone over oil pot directly under drainpipe
  7. Open drain valve and allow oil to drain out of fryer and into pot
  8. With drain still in the open position, ladle some oil from the pot back into the fryer to loosen and rinse crumbs and sediment
  9. CAUTION: Close the drain valve!
  10. Ladle all remaining oil back into the fryer. CAUTION: LADLE, DO NOT PICK UP AND DUMP THE LARGE FRYER OIL POT UNTIL NEARLY EMPTY!
  11. Add additional fresh oil as necessary.
  12. Return fryer to "ON" position.

Fryer Oil Changing

Caution - Allow oil to cool to 160 degrees and wear Neoprene Safety Gloves

Image of Fryer Filtering Image of Neoprene Safety Gloves and Sign
  1. Open the fryer door and turn the gas control knob to the PILOT position. (Some fryers have an on/off)
  2. Caution! Allow the fryer oil to cool to 160 degrees before continuing with this procedure -- test the temperature with the stemmed food thermometer.
  3. Wear hot mitts!
  4. Position the grease shuttle.
  5. Screw the drainpipe into the valve fitting
  6. Open the drain valve and discard the oil into the grease shuttle
  7. At this point the fryer should be empty -- close the drain valve.
  8. Spray the inside of the pot including the back-splash with Oven Spray and let stand for 2-3 minutes
  9. Use metal scrubber to scrub off caked-on caramelized oil that has built up in the pot and on the back-splash
  10. Fill the fryer vat 3/4ths full with water.
  11. Use a towel to slosh the Easy Off from inside the fryer pot and back-splash.
  12. Open the drain and pour several ladle pans full of water into the fryer to flush out remaining crumbs
  13. Use a dry towel and wipe the inside of the fryer vat dry.
  14. Fill with fresh oil.

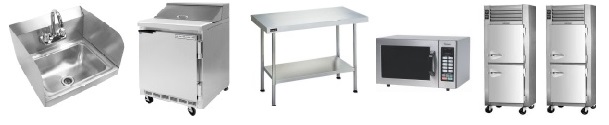
Cold Side Kitchen CleaningImage of Kitchen Cold Side

During the last hour or so of the shift, use a sanitized towel to methodically clean from one side to the other wiping each item.

  1. Hand Washing Sink
  2. Omelet Top Refrigerator
  3. Refrigerator
  4. Freezer
  5. Prep Table
  6. Microwaves

Hot Side Kitchen CleaningImage of Kitchen Hot Side

During the last hour or so of the shift, use a sanitized towel to clean the cook line from one side to the other.

  1. Toaster and toaster Table
  2. Syrup Warmer
  3. Egg Stoves
  4. Grill
  5. Empty Grill TrayImage of Microfiber Mop
  6. Grill board
  7. Separator between Griddle and Fryer
  8. Soup Stove and Table
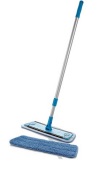
  9. Stainless steel back wall using Microfiber Mop.

Grill Cleaning Instructions


Warning Image IMPORTANT NOTICE TO COOKS AND SERVERS

We don't close the grill to clean it. Closing the grill will kill off business during that time everyday. So never tell customers or the server, the grill is "closed" for cleaning. Just quickly clean the grill between orders and get it back into operation without saying anything.


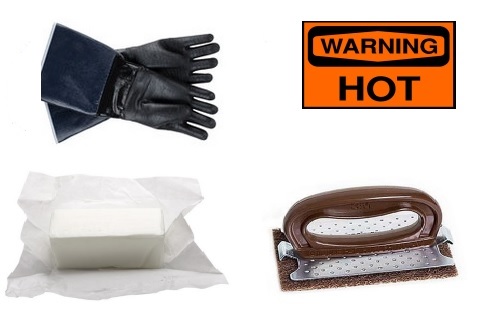
1st & 2nd Shift Method - Lard and Grill-Pad Cleaning Method Image of Grill Cleaning Products

Caution - Wear Neoprene Safety Gloves

  1. Apply small amount of lard to grill
  2. Use the "grill pad with handle"
  3. Scrub forward and backward until all surfaces, including the corners and sides of the grill are shiny clean
  4. Place a "grill screen" under the grill pad and polish the surface
  5. Scrape any remaining lard from the grill
  6. Wipe the grill with the grill pad
  7. Empty grease pan under grill into bucket in back and wash grease pan
  8. Wipe the stainless sides around grill.

3rd Shift Method - Scotch Brite Liquid Cleaning MethodImage of Grill Cleaning Products

Caution - Wear Neoprene Safety Gloves

  1. Attach the pad to the long handled pad holder
  2. Pour the contents of one packet of Scotch Brite Quick Clean Griddle Liquid evenly over the hot grill
  3. Spread liquid around the surface of the grill, the grill sides, and grill back using pad on pad holder
  4. Use moderate pressure to scour away burnt-on food
  5. Using the long handled squeegee, scrape the liquid into the grease trap
  6. Wipe the surface thoroughly with a damp towel
  7. Rinse the towel out and wipe clean a second time
  8. To prevent the grill surface from sticking, melt a tiny bit of lard on the grill.
  9. Place a "grill screen" under the grill pad and polish the surface
  10. Use a clean dry towel and wipe off excess lard on the grill
  11. Empty grease pan under grill into bucket in back and wash grease pan
  12. Run pad holder, the pad, and the squeegee through the dishwasher.

Sweep Sweeping Image

Sweep the floors and spot mop as needed.

Empty the Garbage

Just before end of shift, empty the rubbish container, tie the bag and take to the dumpster.

Dishes and Dish MachineImage of Checklist

  • Finish the dishes at the end of the shift and put them away.
  • Pull the "scrap tray" and empty it
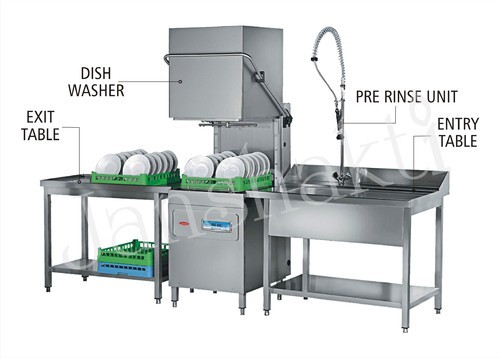
  • Wipe down dishwasher tables and overhead racks
  • Empty the silverware soak tray and refill it
  • Empty and refill the green Kleen-Pail with soapy water from the dispenser.
  • Empty and refill the red Kleen-Pail with bleach and water from the dispenser. 
  • Hang wet towels to dry for reuse later
Image of Linen BagImage of Soapy Bucket Image of Soapy Bucket


Time records and workplace integrity

Read the current handbook's ETWR policy for early starts, missed or shortened meal breaks, and late finishes. The ETWR report form also provides for missed punches and unreported tips; ask your manager how to report those corrections through the current process.

Before recording completed duties, handling payments or correcting records, read the current Workplace Integrity Standards. These are contextual handbook readings; this training reference does not submit a time correction or acknowledgement.

CHAPTER 3

Prep, recipes & packaging

6 sections

SECTION 3.1

Prep work: every shift participates

Prep work is part of the job for both cooks and servers on every shift. We receive food in bulk and portion it for convenient, efficient use. Each shift has assigned prep—for example, Denver mix cups on first shift, french fries on second shift, and appetizer baskets on third shift.

Share the work between customer needs

The cook has primary responsibility because the kitchen station allows prep between food orders. Servers must also participate while keeping up with customers. Prep is not work for one position or one shift alone.

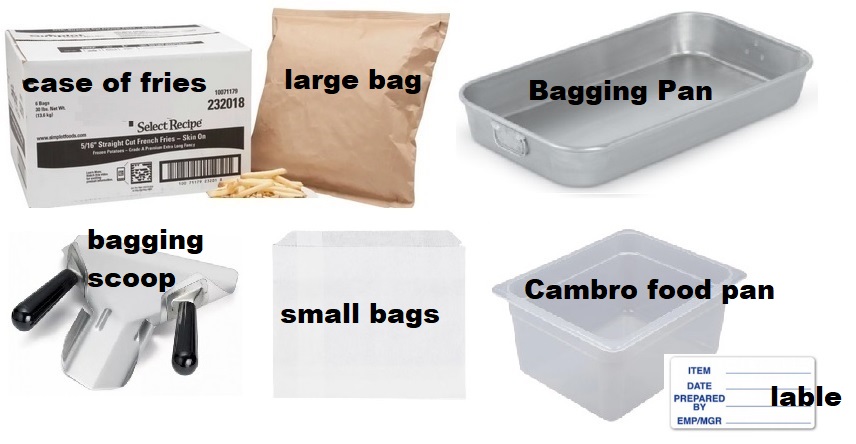
For example, two french-fry bagging pans and two scoops are available so both people can work on the task. The server can set up in the kitchen or another suitable area while continuing to keep an eye on customers.

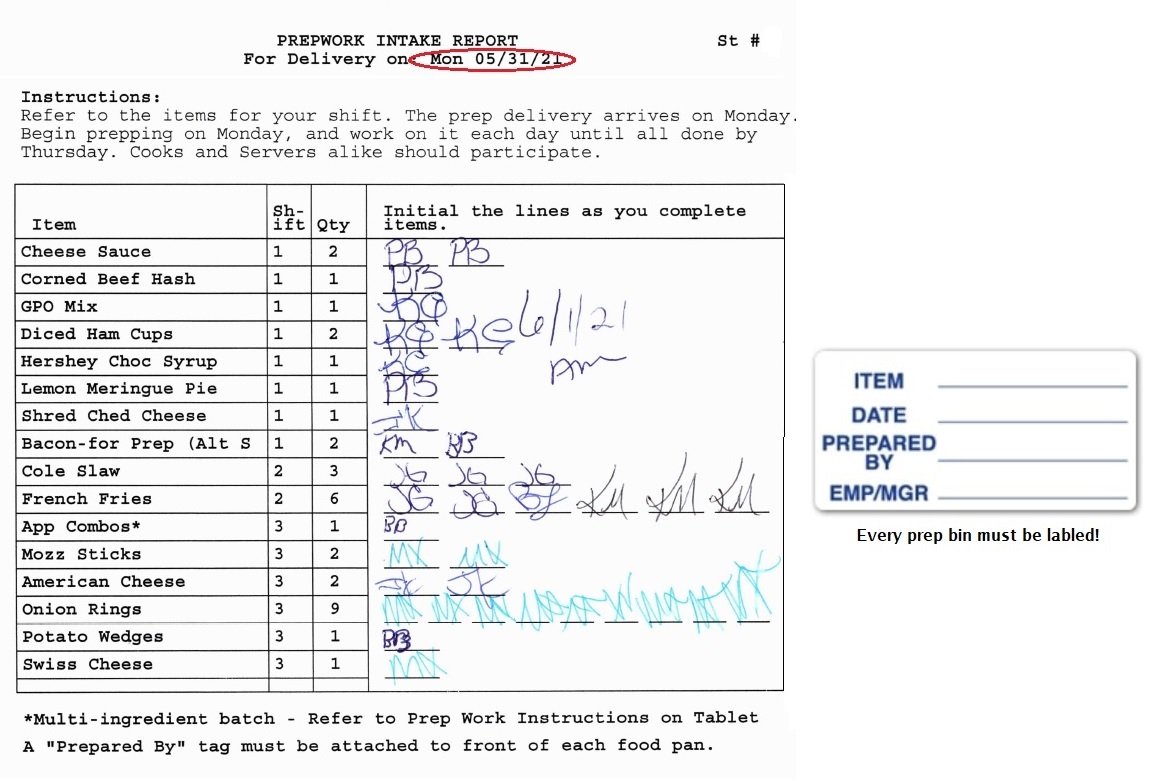
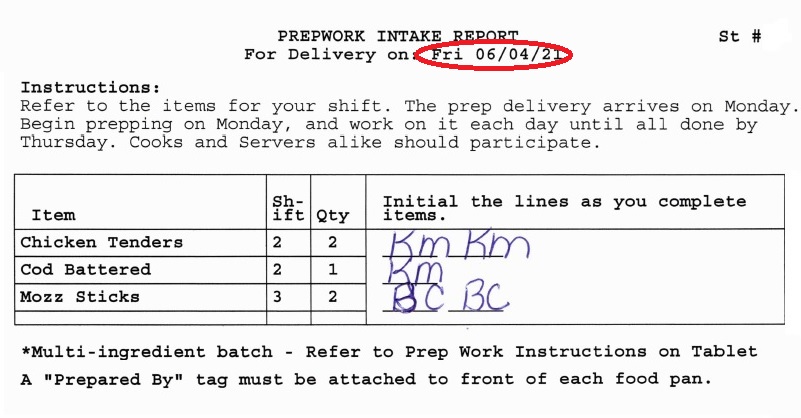
Use the Monday prep intake report

Most prep items arrive Monday morning. Beginning Monday and continuing Tuesday and Wednesday, work on completing all items assigned to your shift on the intake report. Both the cook and server should know what their shift still needs to prepare.

Monday prep-work intake report

Complete Friday additions promptly

If the manager orders additional products for Friday, complete those prep items immediately on Friday.

Friday prep-work intake report

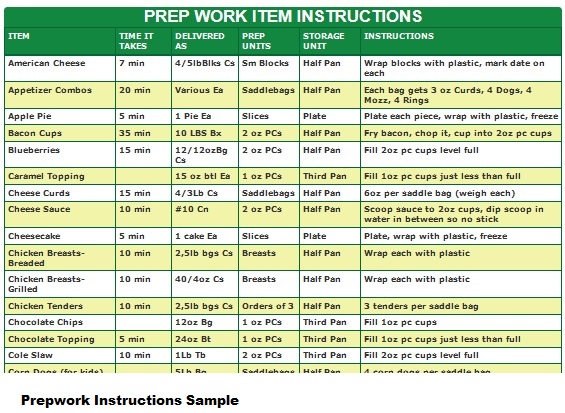
Follow the item instructions

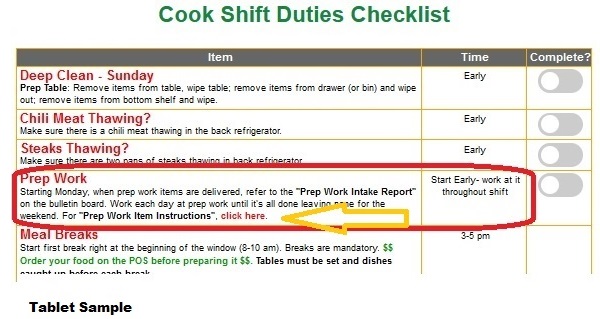
The prep item instructions explain how to prepare each product, the expected yield and the storage container to use. Both cooks and servers should use these directions. They are also linked under Prep Work on the shift-duties tablet.

Prep-work link on the station tabletPrep item instructions example

If you are assigned as a dedicated prep employee, see the Prep Person job description. Shared prep remains part of cooks’ and servers’ work.

French Fry Bagging Instructions

Cambro

  1. Wash your hands
  2. Locate the Bagging Pan
  3. Put one large bag of fries in the pan.
  4. Pour the large bag of fries into the bagging pan.
  5. Scoop fries and fill small bags weighing to 5 oz each.
  6. Adjust small bags by taking a few fries out or adding a few fries to get to 5 oz each.
  7. Locate plastic cambro food pan.
  8. Align the small bags nicely into cambro food pans. It will take 2-3 cambro food pans for a large bag of fries.
  9. Continue with the next large bag.
  10. Fill out and place a prep label on the cambro food pan.
  11. Continue with the next large bag.

Important: It should not take more than about 45 min uninterrupted to complete one case of fries, containing six large bags.

SECTION 3.2

Prep work item instructions

Shared prep instructions · revision 1

ItemTime it takesPrep unitsStorage unitGlovesHow to
American Cheese7 min16 blocksHalf PanYesWrap blocks with plastic, mark date on each
Appetizer Combos20 min8 saddlebagsHalf PanNoEach bag gets 3 oz Curds, 4 Dogs, 4 Mozz, 4 Rings
Bacon Cups35 min175 2 oz PCsHalf PanNoFry bacon, chop it, cup into 2oz pc cups
Blueberries15 min150 2 oz PCsHalf PanNoFill 2oz pc cups level full
Cake5 min14 slicesPlatesYesPlate each piece, date mark adding 7 days to current date, wrap with plastic, freeze
Cheese Curds15 min25 saddlebags per two big bagsHalf PanNo6oz per saddle bag (weigh each)
Cheese Sauce10 min60 2 oz PCsHalf PanYesScoop sauce to 2oz cups, dip scoop in water in between so no stick
Cheesecake5 min16 slicesPlatesYesPlate each piece, date mark adding 7 days to current date, wrap with plastic, freeze
Chicken Breasts-Breaded10 min40 breastsHalf PanNoWrap each with plastic
Chicken Breasts-Grilled10 min40 breastsHalf PanNoWrap each with plastic
Chicken Tenders10 min24 saddlebagsHalf PanNo3 tenders per saddle bag
Cole Slaw10 min30 2 oz PCsThird PanYesFill 2oz pc cups level full
Corned Beef Hash20 min11-12, 5 oz slices per tubeHalf PanNoThaw, slice, and wrap
Denver Cups20 min175 2 oz PCsHalf PanNo1 bag diced ham, 2 bags green pepper, 1 bag onions
Diced Ham Cups10 min82 2 oz PCsHalf PanNoFill 2oz pc cups level full
Diced Sausage20 min160 2 oz PCsHalf PanNoDice sausage patties and fill 2oz pc cups
Fish5 min21-23 saddlebagsHalf PanNo3 fish pieces per saddle bag
French Fries45 min per case of six bagsApprox 15, 5oz bags per big bagHalf PanNoPut big bag fries in bagging tray, scoop into fry bags and weigh each to 5oz, click here for complete instructions. here
GPO Mix10 min74 2 oz PCsHalf PanNo1 bag each- frozen green pepper and frozen onion. Fill 2oz pc cups
Green Pepper Cups5 min50 2 oz PCsHalf PanNoFill 2oz pc cups level full
Mozz Sticks5 min9 saddlebagsHalf PanNo6 sticks per saddle bag
Mushroom Cups10 min2 oz PCsHalf PanNoUse scoop and fill 2oz pc cups
Oatmeal5 min2 oz PCsHalf BinYesFill 2oz cups level full
Onion Rings3 min8 saddle BagsHalf PanNoPlace 5 small and 5 large rings per saddle bag
Pie5 min7 slicesPlatesYesPlate each piece, date mark adding 7 days to current date, wrap with plastic, freeze
Potato Wedges45 minAbout 13 saddlebagsHalf PanNoPut big bag fries in bagging tray, fill individual saddle bags and weigh each to 7oz
Salsa10 min70 2 oz PCsHalf PanYesFill 2oz pc cups slighly less than full
Shredded Cheddar15 min96 2 oz PCsHalf PanYesFill 2oz pc cups level full
Steak Sauce15 min125 1 oz PCsHalf PanYesFill 1oz pc cups level full
Strawberry Topping5 min20 2 oz PCsHalf PanYesFill 2oz pc cups slightly less than level full
Swiss Cheese5 min4 blocksHalf PanYesWrap blocks with plastic and date each with marker

SECTION 3.3

Steak thawing

Steak thawing

Keep one or two pans of steaks thawing, based on how busy your store or shift is. Follow your manager’s direction.

SECTION 3.4

Wheatcake batter

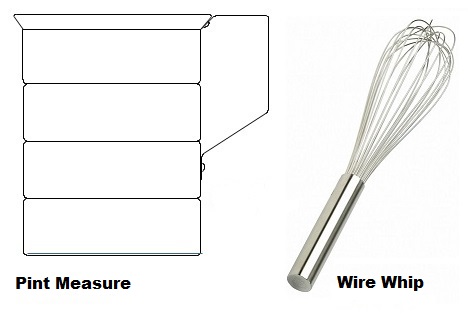
Wheatcake BatterImage of Batter in Soup PotImage of Wheatcake Bowl

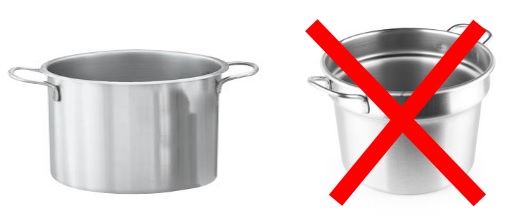
Only make wheatcake batter in the wheatcake bowl, not a soup pot.

Single Batch
  • 1 bag flour
  • 1-1/2 pints milk
  • 1 pint buttermilk
Double Batch
  • 2 bags flour
  • 3 pints milk
  • 2 pints buttermilk

Preparation: Add the milk and whip into a smooth paste with no lumps, then add the buttermilk and whip again. Pour remainder of old batch onto top new batch.

SECTION 3.5

French-toast batter

French Toast Batter

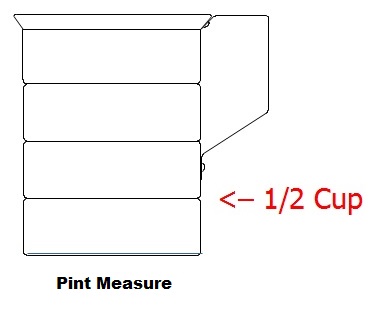
Image of Pint Measure

Bulk Recipe

  • 8 eggs
  • 1/2 cup milk
  • dash salt

Preparation:  Combine ingredients and beat thoroughly using a fork.

Individual Order Recipe

If needed, you can make just enough for one order of French Toast.

  • 1 egg
  • Tablespoon milk
  • dash salt


SECTION 3.6

Carryout packaging specifications

Start with Menu Reference in Kitchen station procedures to identify what belongs with the order. Then use the current carryout reference below to choose the container, packing arrangement and included items.

The same underlying reference is used by the kitchen tablet. This training rendering has no completion form.

Current Carryout Packaging reference

Training reference only. This view cannot submit shift duties.

Open full-size reference

CHAPTER 4

Soups and chili

6 sections

SECTION 4.1

Chili: base through finished batch

Chili

Chili meat thawing

Chili meat takes a long time to thaw. Keep one or more packages thawing in the refrigerator. Check the supply and move another package from the freezer when needed. Whenever you make a chili base, take another package of chili meat out of the freezer to thaw.

Image of Chili Pot

Mandatory!

  • Make Chili in a chili pot - never a soup tureen!

Part 1 - Make the Chili Base

  • 1 package thawed Chili meat
  • 1 gallon cold water

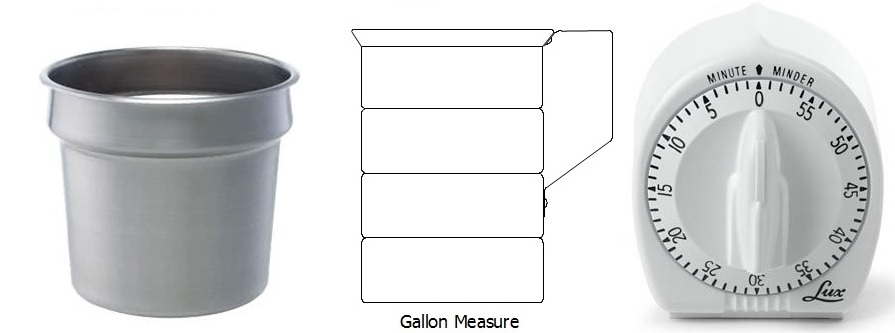
Image of Gallon Measure Open package of thawed chili meat. Locate small package of suet, spread it around bottom of pot. Place meat into pot. Fry meat over medium-high flame. While meat is frying, continually chop and stir with large spoon until meat is completely cooked through, all finely crumbled and cooking in it's own juices. No large chunks of meat! Add one exact gallon of cold water.

Part 2 - Cook the Chili

  • 1 Chili Base (per instructions above)
  • 1 full bottle of ketchup
  • 1 bag chili spaghetti
  • 1 bag chili spices
  • 6 shakes Tabasco sauce (shakes not drops)
  • 1 can red beans with liquid

To the chili base, add the above ingredients except the red beans. Bring to a boil over medium flame, then turn flame down and simmer for ONE HOUR! Set kitchen timer. DO NOT STIR DURING THE HOUR.

When the timer rings, add the red beans and juice. Stir fully. Turn flame to med-low and bring back to slow boil. Stir every 10 minutes until chili comes to a slow boil or temperature rises to 165 degrees.

Pour into a clean large soup tureen. Pour the remaining chili from out front to the top off the new batch. Put out front for serving.

SECTION 4.2

Chicken noodle soup


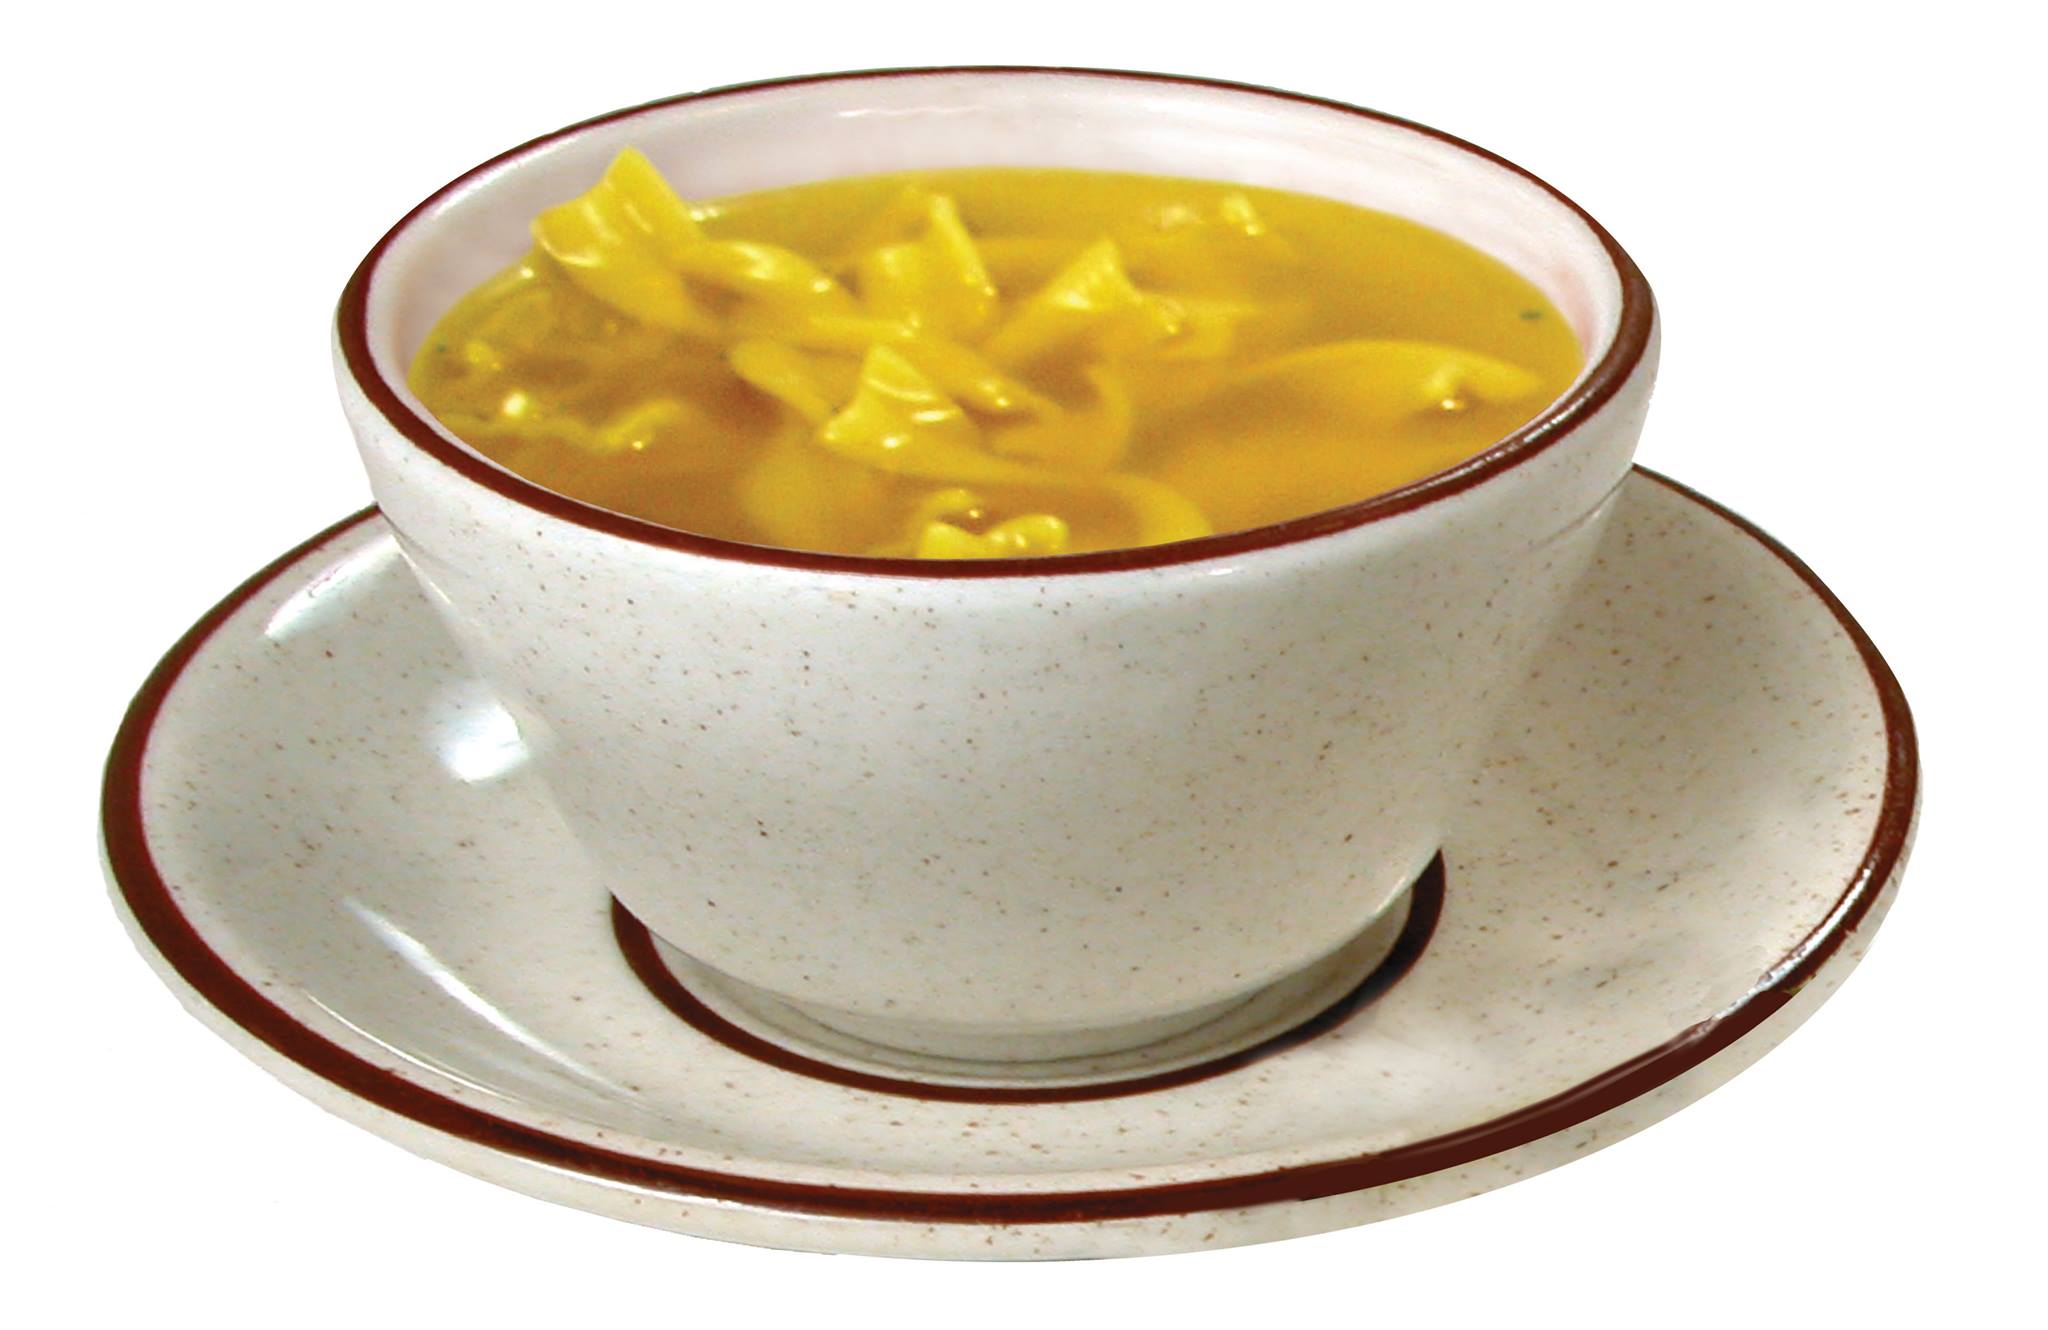
Chicken Noodle Soup

When to make Chicken Soup?

  • When the pot out front is down to 2 or 3"
  • Anytime the broth has turned dark
  • Anytime the noodles are broken down/mushy down

Recipe

Image of Cup Chicken SoupImage of Tureen, Measure and Timer
  • 1 gallon cold water
  • 1 package soup mix
  • 1 package noodles

Instructions:  Bring to boil over a high flame. Lower flame to simmer. Add soup mix and noodles. Set timer for 15 minutes When timer rings, soup is done.

Do not mix old and new Chicken Soup. Discard the old and put out the new.

SECTION 4.3

Bean soup


Bean Soup

  • 1 bag Great Northern Beans
  • 1 pre-portioned Seasoning
  • 8, 2 oz PC's diced ham
  • 4 quarts water

Instructions:  Rinse beans in colander. Place beans in soup pot. Add seasoning packet. Add the 4 quarts (1 gallon) water. Bring to a boil, cover and simmer for 3 hours.Stir soup periodically.At end of three hours (or when beans are soft but not mushy) punch with masher 8 times.

SECTION 4.4

Pea soup


Split Pea Soup

  • 1 bag pre-packaged Split Peas
  • 1 pre-portioned Soup Seasoning
  • 8, 2 oz PC's diced ham (or 1 cup)
  • 3 quarts water

Wash peas in collander. Please peas into 11 qt soup pot. Add seasoning packet. Bring to a low boil, cover and simmer for 1-1/2 hours. Stir regularly, this soup will stick to bottom and burn very easily!

SECTION 4.5

Potato soup


Cream of Potato Soup

  • Half a bag of potatoes
  • Enough water just to cover potatoes
  • 1/2 cup fresh sliced onions
  • 8, 2 oz PC's diced ham (or 1 cup)
  • 1/4 lb butter
  • 1/2 package soup seasoning
  • 3 quarts milk (more or less as necessary for the correct consistency)

Put the potatoes in the large (11 qt) soup pot. Add the onions to the potatoes. Cover potatoes with water and boil until tender. Watch while cooking, you may have to add glass or two of water if too thick. Do not pour off water when potatoes are done. Mash the potatoes. Add the diced ham and the butter. Let soup cool for one hour. Add the milk, stirring with masher as you are adding milk. Finally, using a "double boiler" bring the soup to serving temperature.

SECTION 4.6

Vegetable soup


Vegetable Soup

  • 1 bag pre-packaged bag frozen vegetables (carrots, celery, diced potatoes)
  • 1 cup onions
  • 1 pre-packaged barley and soup seasoning mix
  • 1 can Tomato Magic (crushed tomatoes)
  • 5 quarts water
  • 1/4 lb butter

Bring to a boil, cover and simmer 1 hour. Add the butter and stir.

CHAPTER 5

Serving our customers

4 sections

SECTION 5.1

Server fundamentals

POS usage: carryout customer names

Ask for the customer's name on carryout orders so the correct order reaches the correct customer. Never leave the name blank or use only a letter or placeholder.

The only exception is a server-only item, such as a beverage or soup/chili, that you obtain immediately and hand directly to the same customer you just assisted. For every other carryout order, always get the customer's name.

This exception is only about the name. Ring it, THEN bring it: enter every item before preparing or serving it.

Practice a carryout order with your trainer using the current Aldelo Express instructions.

Fundamentals

Greeting

Greet every customer the moment the door opens! Why? It lets customers know they've been seen, and gives them hope they will receive service quickly. Even when the store is super busy, don't work with blinders on as though you didn't see the new customer! Look up and greet, and point out an open seat, or indicate where and when a seat may become available.

Use Nice Words

Talking nicely and using good language shows respect. Use these standard phrases with customers.

  • Welcome to George Webb
  • How may I help you?
  • Are you ready to order?
  • May I take your plate?
  • Is there anything else I can get you?
  • Thank you.

No "Sweetie, Honey, Hun, or Dear"

Unless it's your significant other, children, parents, friends, -- not a stranger at the table, never utter these mushy terms of endearment. Customers don't like it, and some are actually offended by it. What should you use? Nothing, or sir, or mam, or their name, if you know it.

Service with a Smile

  • Smile
  • Show kindness
  • Be friendly
  • Be quick about your service
  • Keep an eye on the table whenever you pass by
  • Collect the dishes as everyone has finished eating. This encourages tipping and helps to turn tables.
  • Be prompt to collect. If the customer has to wait to pay, it discourages a tip.

Ten Steps of Customer Service

More Tips for Successful Customer Service

  1. Show kindness
  2. Let Customers Have Their Say
  3. Keep your cool. Never argue back to a customer! Getting angry will make the situation worse!

Examples:

Customer:  "My ordered still hasn't arrived. I want my money back."

You:  "I'm sorry, let me check on it immediately."

Beverage Service

Coffee Service

  1. Initially bring the cups to the table along with the coffee pot when possible.
  2. Pour coffee at the table whenever practical to demonstrate freshness, temperature, and quality.
  3. This is especially important during slower periods or when first serving coffee.
  4. During busy periods, efficiency takes priority, but service should still be prompt and attentive.

Coffee Refills

  • Customers should never feel they have to ask for coffee. Stay aware and anticipate refills.
  • Keep an eye on cups and offer refills promptly, especially during breakfast.
  • When refilling one guest, check others at the table.
  • Always ask before refilling. Do not assume.
  • Many customers prefer their coffee a certain way (cream, sugar, temperature) and may not want more.
  • Do not automatically top off partially full cups without asking. This creates waste.
  • Provide one to two refills as expected service. Do not continue refilling excessively.
  • After one or two refills, pause and wait for the customer to request more.
  • Refills should be poured at the table. Do not take cups away to refill them.

Refill Limits and Beverage Types

  • Free refills apply to brewed coffee and fountain soda only.
  • Offer one soda refill. Additional refills should not be routinely offered.
  • No free refills on lemonade, juices, milk, or hot tea.
  • These beverages have a higher cost and must be purchased again if the customer wants more.

To-Go vs. Dine-In Coffee Policy

  • Refills are based on the type of service purchased, not the container used.
  • Dine-in coffee in standard cups includes refills while the customer is in the restaurant.
  • To-go coffee does not include free refills, even if the customer is dining in.
  • Do not provide refills or top-offs in to-go cups.
  • If a customer requests a to-go cup while dining in, ring it in as a to-go coffee.
  • If a customer wants refills, offer to serve the coffee in a dine-in cup instead.
  • If a customer asks for a final refill in a to-go cup, politely explain that another coffee must be purchased.
  • Customers requesting dine-in coffee in a to-go (styro) cup should be charged as a to-go coffee.
  • Managers may approve exceptions for service recovery or special situations.
  • Servers should not make exceptions on their own.

Server Script – Beverage Communication

  • Offering coffee refill:
    • “Can I warm that up for you?”
  • After one or two refills:
    • “Would you like a little more, or are you all set?”
  • Soda refill:
    • “Can I get you one more refill?”
  • Redirect to dine-in cup for refills:
    • “If you'd like refills, I can bring that in a dine-in cup for you.”
  • Declining refill in to-go cup:
    • “I’m sorry, our to-go coffees don’t include refills, but I can get you another one.”
  • Declining “final to-go refill”:
    • “I can get you a fresh to-go coffee for the road if you'd like.”

Soda Service and Ice Handling

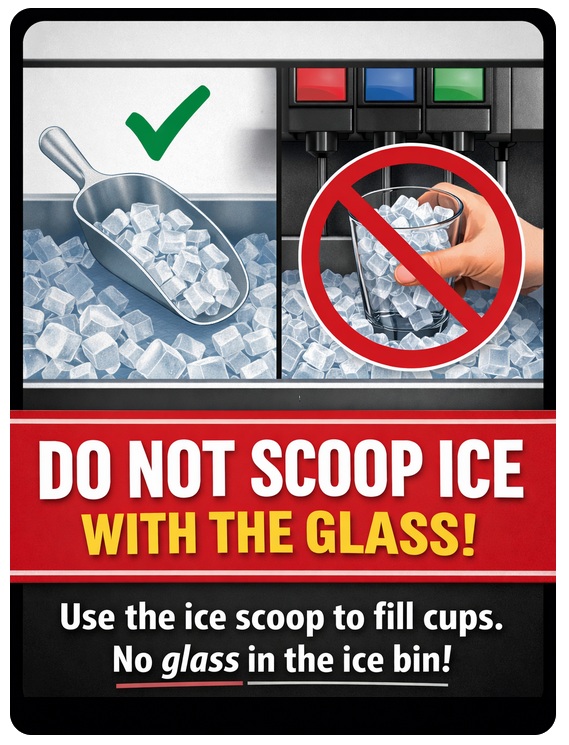
Scooping IceIce must always be handled properly to prevent contamination.

  • Always use the designated ice scoop stored outside the ice bin.
  • Never place a drinking glass directly into the ice bin.
  • Hold the glass outside the bin and use the scoop to transfer ice into the glass.
  • Do not touch the ice with your hands or with the rim of the glass.
  • Return the scoop to its proper holder after use.

Customer Complaint

Late in getting to the customer? Food took too long? Forgot a beverage? It's not the occasional lapse in service that results in us loosing customers, it's failure to show sincere concern.

Recover from a Complaint

Apology Card Image

Follow this two-step process in order to "recover" the situation:

  1. Take Action.  It doesn't matter whose fault it is. Resolve it!

    • "Thank you for waiting, how can I help you?"
    • "I'm sorry about that, let me fix it!"

  2. Issue an Apology Card. Use the opportunity to drive home the point that we value our customers.

Image Restaurant Manager

Is the Manager Here?

We don't always have a manager on duty. So if you get "I want to talk to a manager", ...know that you and others are capable of handling customer service issues. So rather than to say the manager isn't here right now, say: "I am capable of solving your problem. how may I help you?".


Be a "Runner"

It takes longer to prepare the food than it takes to take the order. So the kitchen becomes a "bottleneck".  So to expedite things, "run" back and assist and coordinate the activities of the cook. The faster the food comes out, the faster people are served and will more likely tip and turnover the table.

Pre-Clear Dishes

Dishes Everywhere

Does this look appealing --->?

This is what happens when the server doesn't  "pre-clear" the customer's main dish while the customer is still seated. As you can see, pre-clearing is a a vital step to keeping the restaurant looking tidy.

Where to Pre-clear the Dishes

Bus Pan ImageDon't clutter the sink with dirty dishes. Pre-clear into a bus pan. Keep bus pans handy on the lower shelf of the customer counter and at a nearby bus-cart.

Maintain the Sanitizing Solution Bucket

Red Bucket and Test StripsUse a clean wiping cloth and the bleach water in the red bucket to wipe and sanitize the:

  • tables and seating after each guest
  • menus after each use

Check the Sanitation Solution in the Red Bucket

All wiping cloths should be stored in the red bucket with sanitizing solution. Change the bucket often and test the solution, every 2 hours or more depending on usage. Use test strips found on the wall. It's a simple process of inserting a test strip into the bucks. It should read between 200-400 ppm.

Towel Usage PolicyBar Towel

Proper use and management of our bar towels are essential for maintaining cleanliness, efficiency, and cost control. These towels are a shared resource with a set weekly supply, and improper use or wastefulness negatively impacts our ability to maintain a clean and functional work environment.

Types of Use

1. Light Use (Sanitizing & Wiping Customer Areas)

  • Towels used for wiping and sanitizing customer tables, counters, beverage stations, and other minimally greasy surfaces.
  • These towels must be stored in a sanitizing solution between uses to maintain proper sanitation.
  • When a towel becomes too soiled for presentable use in these areas, do **not** discard it immediately. Instead, hang it to dry on the designated towel racks above the linen bag.

2. Heavy Use (Kitchen & Greasy Surfaces)

  •  Towels used for wiping greasy griddles, egg stoves, grill boards, and other heavily soiled areas.
  •  Before taking a new towel for these tasks, first check and use the hung-to-dry towels that were previously designated as too soiled for light-duty use. These still have useful life for tougher cleaning jobs before being discarded into the linen bag.

Key Expectations:

  • Do not waste towels. We receive a limited number each week, and once they are gone, we are out until the next delivery.
  • Follow the proper towel cycle. Light-use towels should be repurposed for heavy-use cleaning before being discarded into the linen bag.
  • Be mindful of costs. Each towel has a laundering cost, and excessive waste is financially irresponsible.
  • Use towels efficiently. If a towel can still be used for another task, do not prematurely discard it.

Failing to follow these guidelines results in unnecessary shortages and increased costs. Treating our towels like they are unlimited is short-sighted and irresponsible. Everyone is responsible for ensuring we use this resource wisely. Thank you for your cooperation.

Reset Tables

Set Table

Doesn't this look nice --->?

Clear and reset tables before anything else. Before doing dishes, before taking breaks. The place needs to look organized and presentable.

  1. Wipe the table
  2. Pull the condiments away from the menu holder and wipe underneath
  3. Arrange the setups
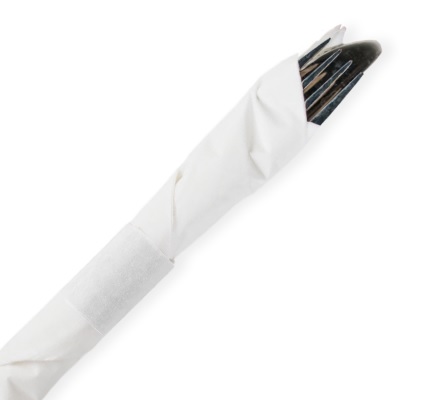
  4. Set out placemat and rolled silverware
  5. Table tent in the middle


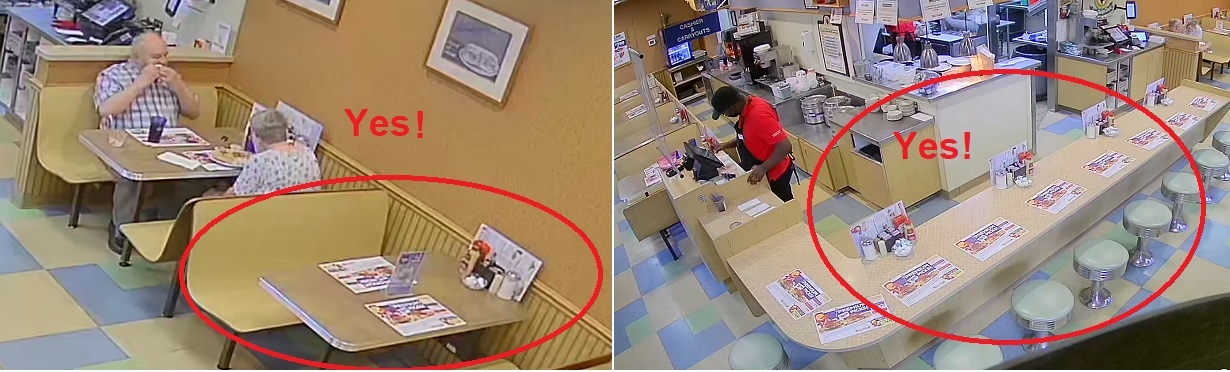
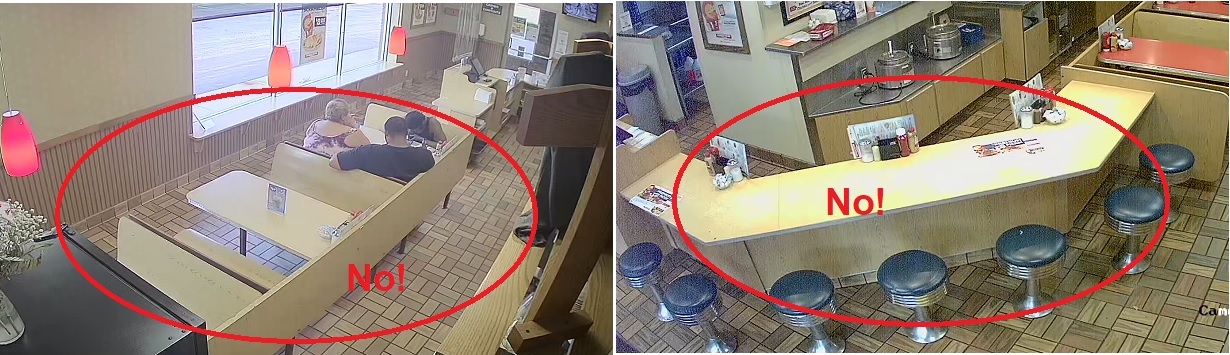
All tables and the counter seats must have placemats and table tents at all times!

Like This!Tables Not Set

Not this! Tables Not Set


Answering the Phone and Phone OrdersTelephone Image


Please make every effort to excuse yourself and answer the phone.

How to Answer the Phone

" Hello, George Webb's on __(street)___, _this is (name)_"

No Immediate Hold Please!

Also please, when you answer, don't immediately say "can you hold" and set the phone down. Allow the customer to state why they are calling. Then, if you must put them on hold, say: "I have another order, I'll be right back with you."

Phone Orders

The phone must be answered and orders taken. When an order roughly exceeds $40, politely inform the customer: "for orders over roughly $40 we ask you to come into the restaurant to place the order, or consider placing the order online at gwtogo.com. It's convenient and fast. Other options to suggest are Door Dash, Uber Eats, or Grub Hub which all have pick up service as well as delivery service.

Table Sections

When there are two or more servers on duty, and the restaurant is busy, you can loosely divide up the restaurant into sections so that each of you can focus on the customers in your section. However, you must continue to work as a team, helping each other as needed, and not avoid helping each other when there is an imbalance as to the number of customers in one section vs another section.

Customer Hand-Off at Change of Shift

The customers don't care about your end-of-shift getting ready to go home issues. Hand-off customers to the new shift with care:

  1. Continue to take orders, entering them into the POS system right up to the end of the shift.
  2. Point out to the next server where each customer is at in the10-steps to service
  3. Point out any pending orders on the POS or in the kitchen.
  4. Transfer pending orders in the POS to the new server.


SECTION 5.3

Customer service and complaint recovery

A service mistake does not have to cost us a customer. What matters is whether we listen, show sincere concern and correct the problem promptly. Take responsibility for helping, even when someone else made the mistake.

Start with respectful service

Use a friendly greeting, a calm voice and courteous language. Simple phrases make the customer feel welcome:

  • “Hello. Welcome to George Webb.”
  • “How may I help you?”
  • “Are you ready to order?”
  • “May I take your plate?”
  • “Is there anything else I can get you?”
  • “Thank you.” / “It’s my pleasure.”

Prevent avoidable complaints

  • Smile and greet the customer as soon as the door opens.
  • Offer a beverage promptly and repeat the order back to avoid misunderstandings.
  • Double-check every carryout bag before handing it to the customer.
  • Watch your tables as you pass. Notice missing items and requests for help.
  • Follow the 10 Steps of Service, including refills, checking back and pre-clearing dishes.
  • Be ready to collect payment promptly. Customers should not have to wait to pay.

Recover from a complaint

Customer expressing dissatisfactionA late greeting, slow food or a forgotten beverage can frustrate a customer. Avoid excuses or an argument about whose fault it was. Show that the concern matters and follow the company’s two-step recovery process.

1. Take action

  1. Listen. Let the customer finish explaining. Pay attention without interrupting.
  2. Clarify. Thank them for telling you and make sure you understand what went wrong.
  3. Apologize sincerely. Say “I’m sorry about that,” rather than offering a long explanation that sounds like an excuse.
  4. Correct the problem promptly. Explain what you will do, then do it.

For example: “I’m sorry about that. Let me fix it.” If the customer has been waiting for attention, say: “Thank you for waiting. How can I help you?”

2. Issue an apology card

Company apology cardUse the apology card to reinforce that we value the customer and want them to return. The card accompanies your effort to resolve the problem; it does not replace taking action.

“Is the manager here?”

Customer-service responsibility illustrationA manager is not on duty at every moment, but you can still help the customer. Instead of ending the conversation with “There is no manager here,” say: “I can help you with the problem. What happened?”

The existing customer-service procedure gives you authority to remake food when necessary and to void a ticket. Follow the required POS and void procedures when doing so. You may also offer: “I can take down your information and pass it on if you like.”

Stay calm when the customer disagrees

Do not argue, compete for the last word or respond physically. Speak quietly and keep the conversation focused on resolving the concern. A positive outcome is the goal.

If the behavior becomes loud, threatening or disruptive to others, use the Customer Disturbance Handling procedure. An ordinary service complaint and a safety situation require different responses.

Practice with your trainer

Role-play a wrong item or a long wait. Practice listening, clarifying, apologizing, explaining the correction and issuing the apology card. Then switch roles and discuss which words and actions showed sincere concern.

SECTION 5.4

Server station procedures

Use the Server Tablet to plan the shift

Read the current day and shift with your trainer, then work through the “When” column around customer service. First-hour work includes the rotating deep clean, soup checks, door glass and dessert-fridge checks. Begin shared prep early and replenish stock whenever it needs attention.

Refresh the sanitizing bucket at the required intervals. During the last part of the shift, work through beverage equipment, the soup station and table setups without interrupting service. Finish the ice, dishes, garbage and floor tasks, and tell the next shift about unfinished work. The checklist supports this handoff; checking a box is not a substitute for doing the task.

First shift refreshes the soup-heater water and checks chili and chicken soup. Later shifts continue refreshing and maintaining the soups. Chili and chicken soup remain available on every shift. First shift makes the scheduled additional soups; all shifts maintain them with a little hot water as needed. When an additional soup runs out, turn off and unplug the heater and remove and wash its pot.

Study the weekday and shift variants below. This training view does not record duties. Use the working tablet for actual completion only after the work is done.

Explore the server shift duties

Training reference only. This view cannot submit shift duties.

Open full-size reference

Soup RefreshSoup Heaters

At the beginning of the shift, pour the chili into a clean pot and wash the dirty pot.

Add some hot water to the chili and to the soup-of-day if either one is too thick.

If the soup of the day has been sold, unplug the heater, and remove and wash the pot.


Door Glass Door Glass Image

The first thing the customers see are the glass doors.

Keep the finger prints removed by regularly spraying with glass cleaner and paper towel.


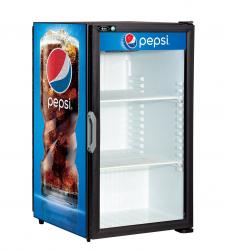
Dessert FridgeDessert Cooler

Check the dates on the desserts. Discard any that are seven (7) or more days old.

List those discarded on the waste report.

Add new plated desserts from the back freezer, add a date sticker as well to each piece.

Stock bottled beverages as needed.

Wipe out the inside of the cooler and the door glass both sides.


Red BucketRed Bucket

Keep wiping towels stored in the red bucket at all times. Don't leave towels lying around in view of customers.

Refresh the red bucket with bleach-water from the dispenser at the beginning of the shift and every two hours, more if necessary.


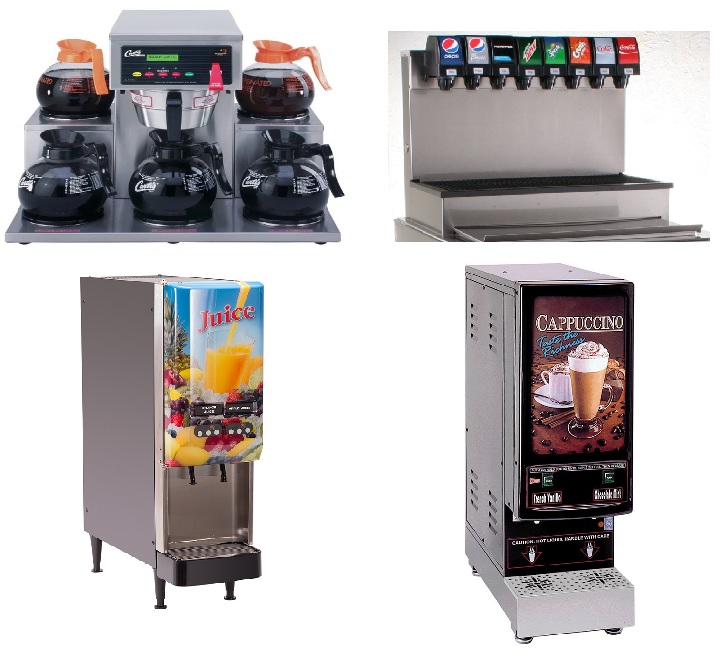
Beverage Machines Beverage Equipment Image

Wipe down the following beverage counter items starting on one end and working to the other:

  1. Coffee Machine
  2. Hot Chocolate/Cappuccino Machine
  3. Soda Machine
  4. Orange Juice Dispenser

Soup Station Soup Station

If the soup of the day is gone, unplug the heater, empty the water, and scrub out the inside of the heater at the sink.

Wipe down the outside of each heater.

Wipe down the stainless steel counter.


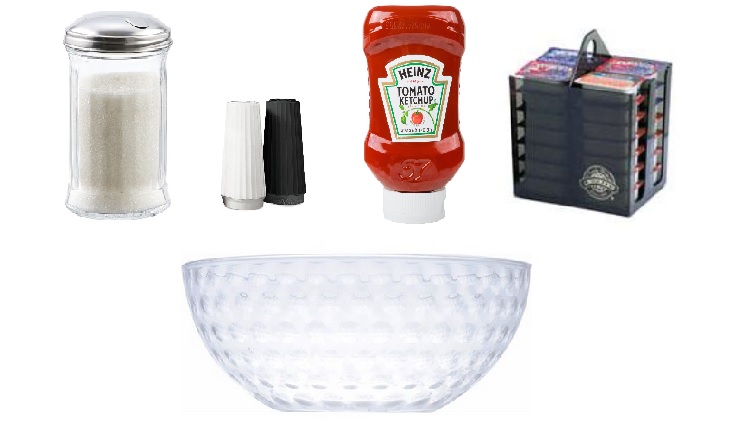
Table SetupsTable Setups

The setups are the condiments at the tables.

Clean and fill the setups during the shift as follows:

  • Do setups in place rather than to gather the items
  • Take a sanitized wiping cloth and the sugar can
  • Visit each setup as follows:
  1. Wipe and fill sugar jar
  2. Slide condiments away from menu holder and wipe the counter underneath
  3. Wipe the ketchup & mustard
  4. Wipe the salt & pepper shakers
  5. Fill the jelly caddies
  6. Fill the creamer bowl
  7. Wipe the menu.

Wrapping Silverware Silverware RollSilverware Bucket

Work ahead during the shift in order to leave two full bins for the next shift, plus all tables set.


Set the TablesImage of Set Tables

Always return the tables to a set up status.

Placemats, silverware bundle, table tent in the middle.


SweepSweeping Image

Pick up paper and litter as you see it. Sweep the floors and spot mop as needed.


Empty the Garbage

Shortly before end of shift, empty the rubbish container(s), tie the bags and place in back or take to the dumpster.


Ice Bin Image of Ice Bucket

Top off the ice bin at the soda machine.


Dishes and Dish MachineImage of Checklist

  • Finish the dishes at the end of the shift and put them away.
  • Pull the "scrap tray" and empty it
  • Wipe down dishwasher tables and overhead racks
  • Empty the silverware soak tray and refill it
  • Empty and refill the green Kleen-Pail with soapy water from the dispenser.
  • Empty and refill the red Kleen-Pail with bleach and water from the dispenser. 
  • Hang wet towels to dry for reuse later
Image of Linen BagImage of Soapy Bucket Image of Soapy Bucket


Time records and workplace integrity

Read the current handbook's ETWR policy for early starts, missed or shortened meal breaks, and late finishes. The ETWR report form also provides for missed punches and unreported tips; ask your manager how to report those corrections through the current process.

Before recording completed duties, handling payments or correcting records, read the current Workplace Integrity Standards. These are contextual handbook readings; this training reference does not submit a time correction or acknowledgement.

CHAPTER 6

POS, cashiering & integrity

6 sections

SECTION 6.1

Aldelo Express POS instructions

Aldelo Express: cashier iPad, handhelds and kitchen display

The cashier-station iPad and handhelds are used to enter customer orders. The kitchen display system (KDS) shows orders for the kitchen. Learn the role of each device with your trainer before taking a customer's order.

Sign in

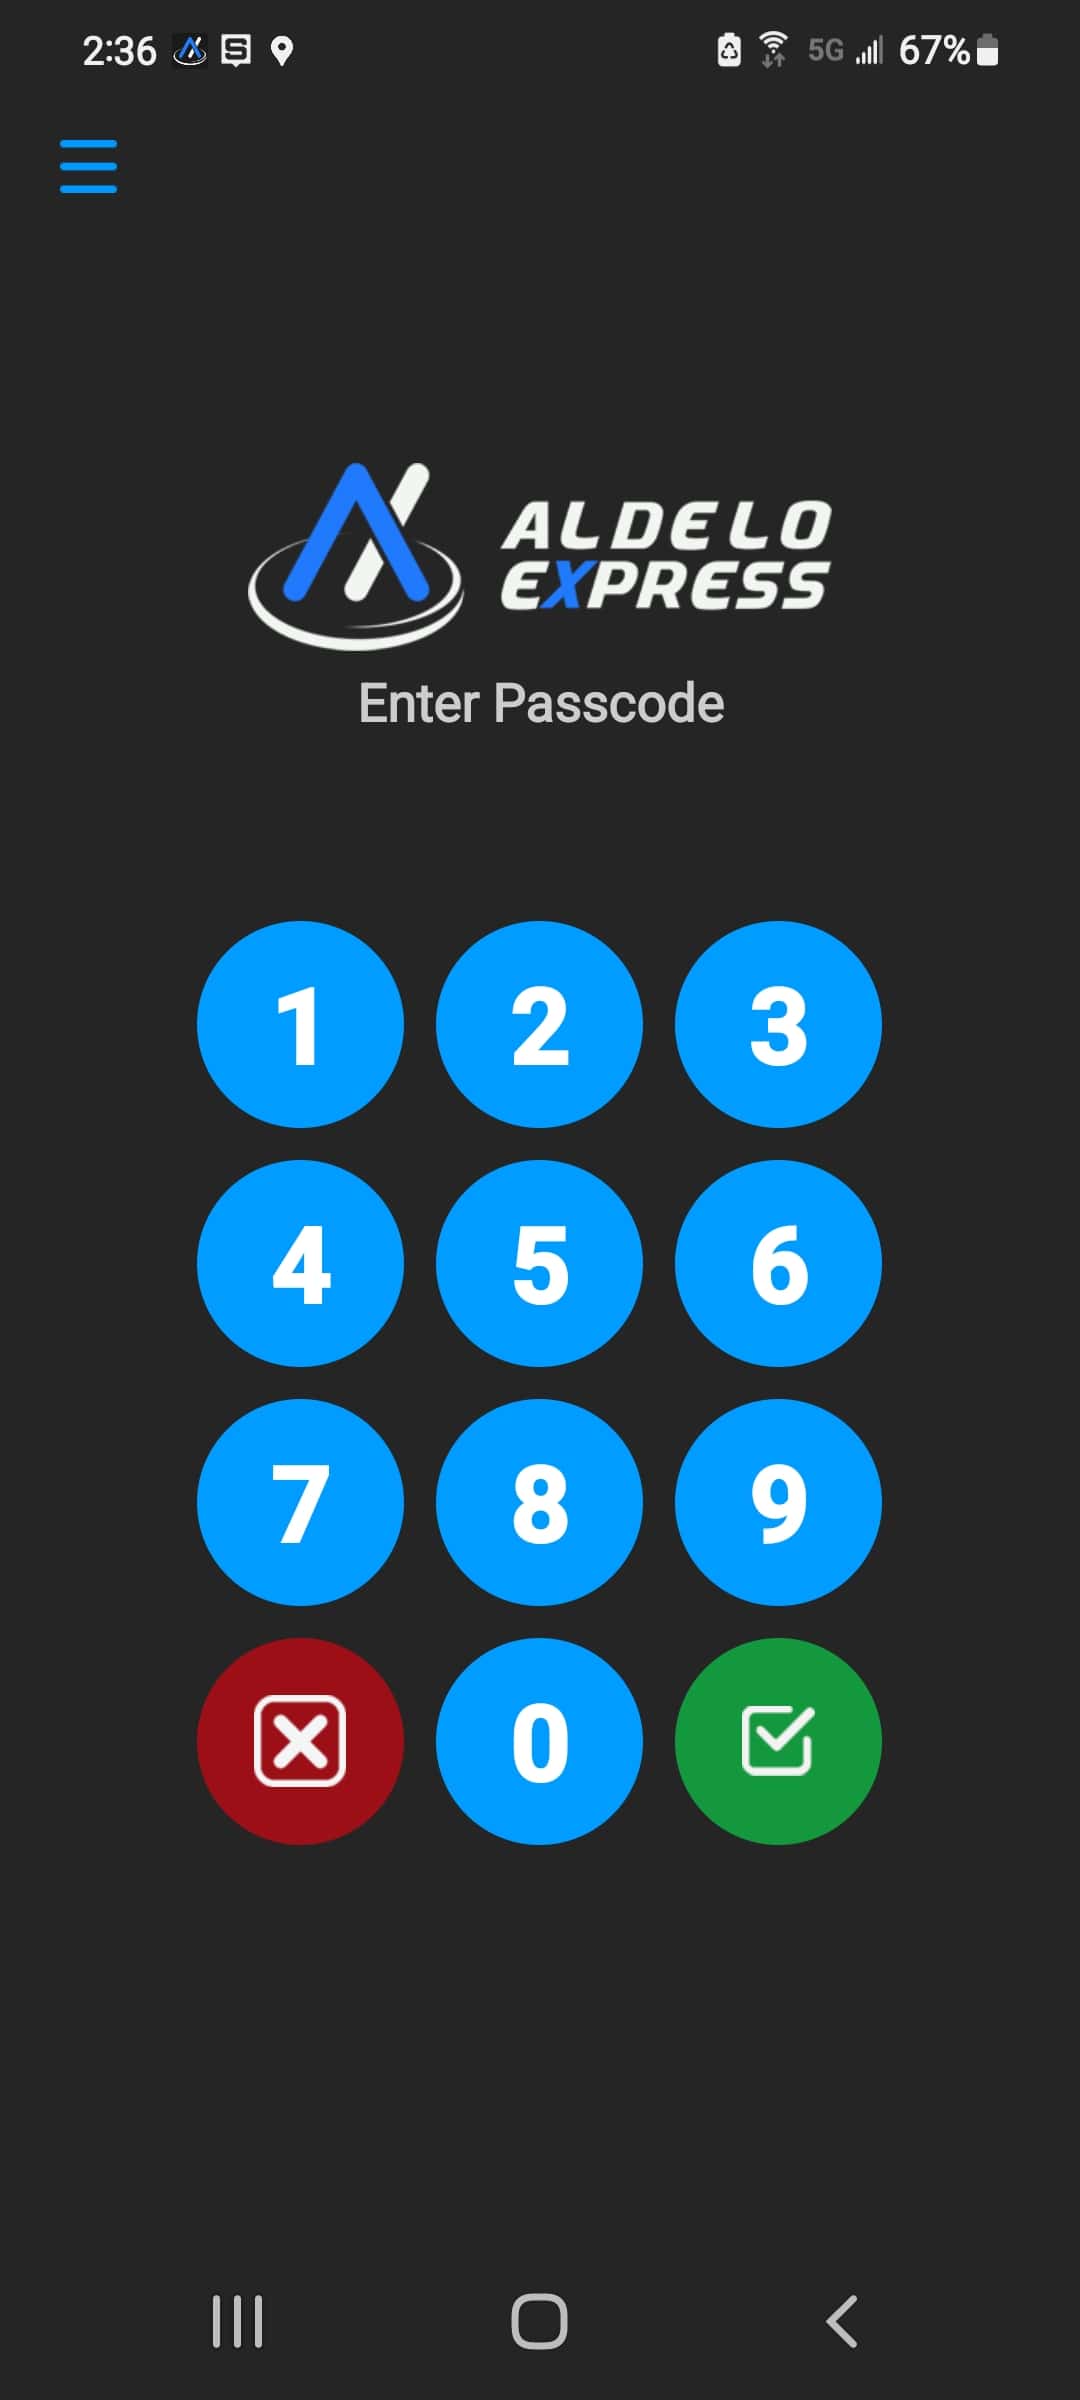
At the Aldelo Express Enter Passcode screen, enter your assigned passcode. Use your own access; ask your manager for help if you cannot sign in. The example below shows the mobile login screen. Your device's layout can differ.

Aldelo Express mobile Enter Passcode screen; no code entered
Verified existing Aldelo Express login image.

Ring a basic sale

  1. Confirm whether the customer is dining in or taking the order out. For carryout, follow the customer-name rule below. Use the order type appropriate to the request, and confirm any table or guest information required at your store.
  2. Enter beverages and server-only items first so they are not missed. Choose the menu category and the food item requested.
  3. Complete the item's choices and modifiers to match the order. Confirm quantities, sides and special requests with the customer.
  4. Ring before you bring: enter items before serving them. Review the items and order details before sending them to the kitchen. Have your trainer demonstrate the correct send control on your assigned device and how to confirm that the order reached the KDS.
  5. When payment is due, verify the correct check and amount. Follow the payment workflow demonstrated by your trainer. The cash, credit-card and correction button sequences are awaiting Melissa's confirmation below.
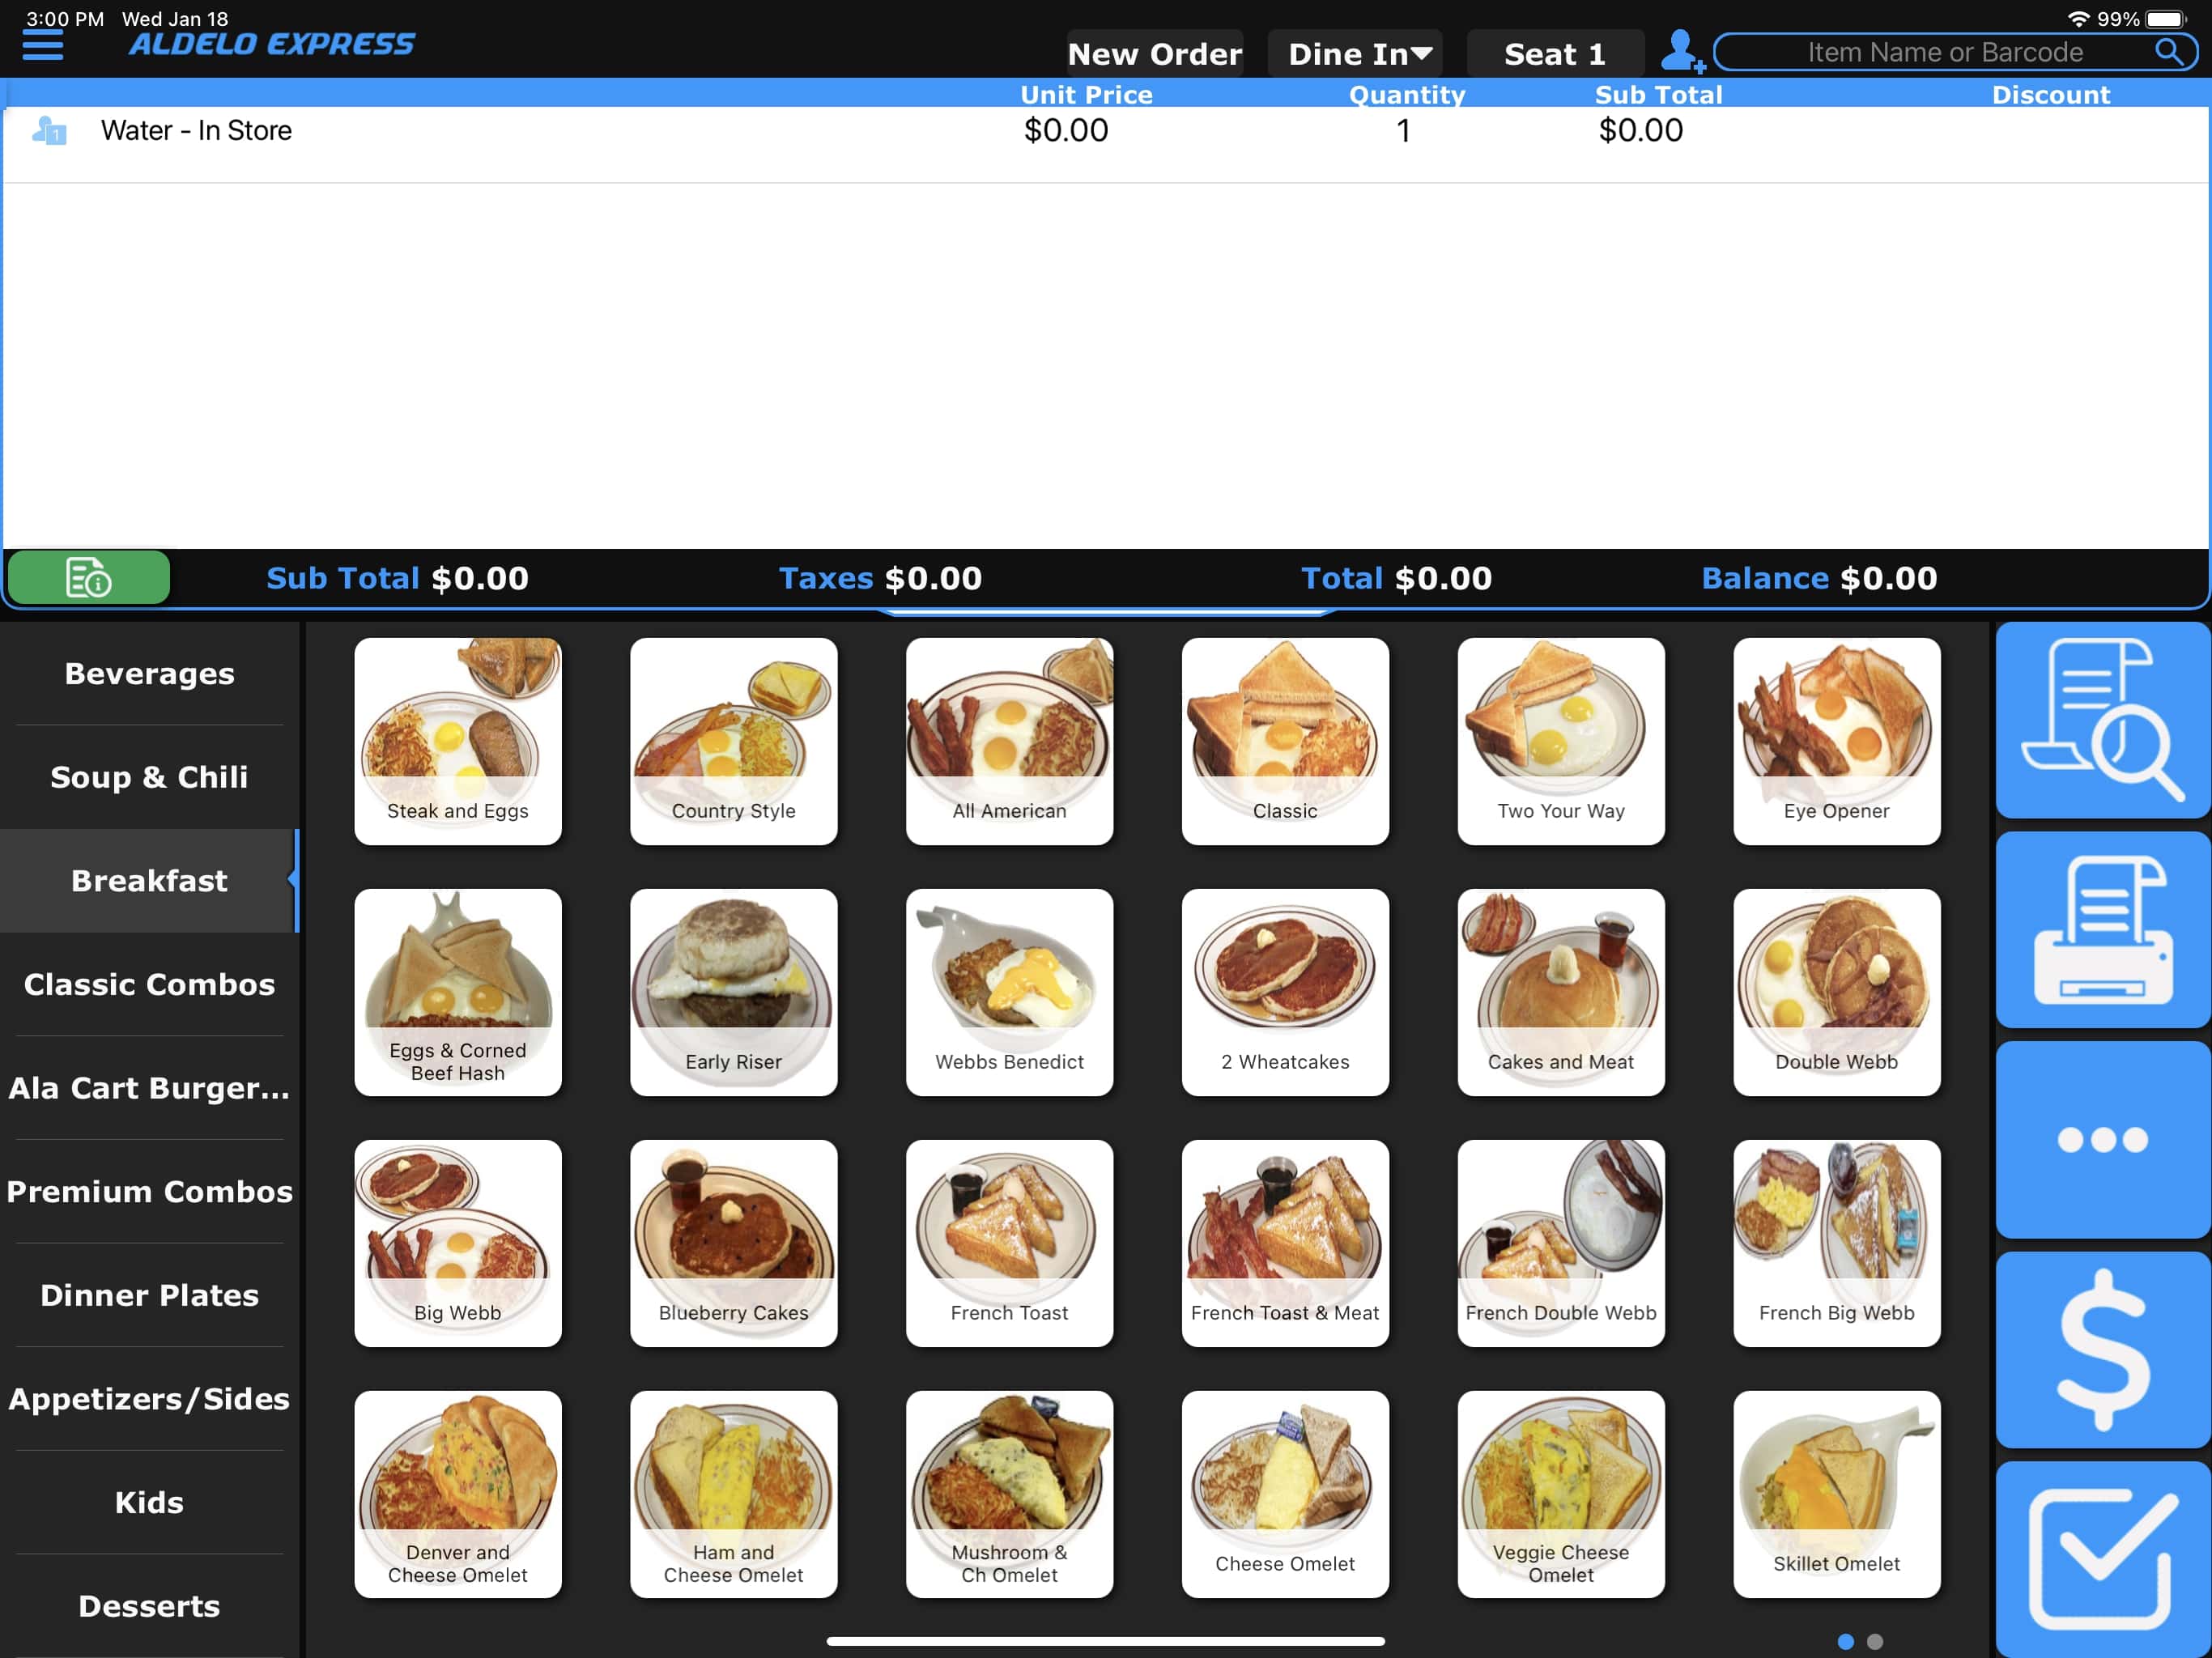
Aldelo Express iPad order-entry screen showing menu categories and item tiles
Verified iPad order-entry image. Categories are on the left; selected items appear above the menu. This is an example screen, not a statement of current prices.

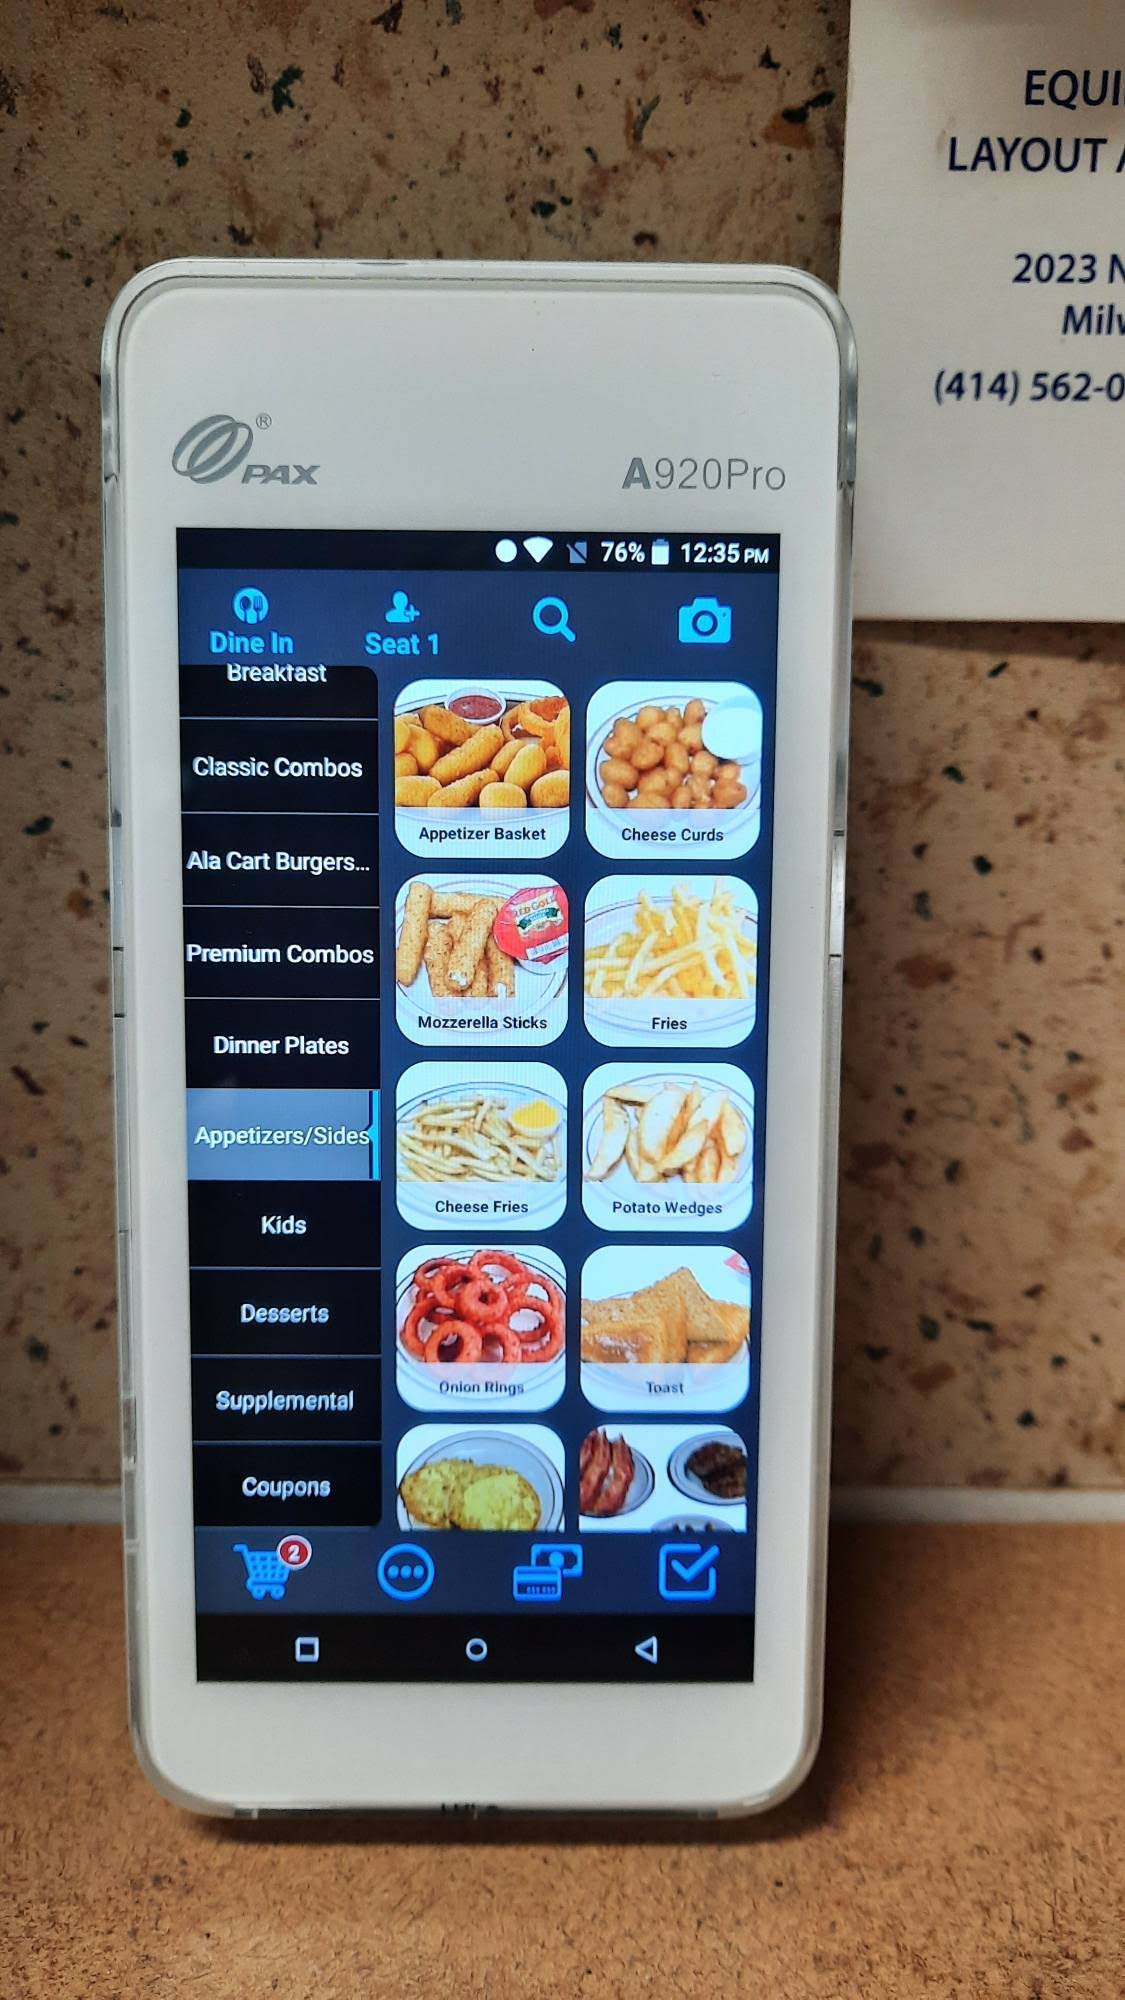
Using the handheld

The handheld also presents menu categories and item tiles. Read the selected order type and check the order before sending. Do not assume that controls are in the same location as on the cashier iPad.

PAX handheld showing an Aldelo Express menu-category and item-selection screen
Verified existing handheld photo; no payment or receipt details shown.

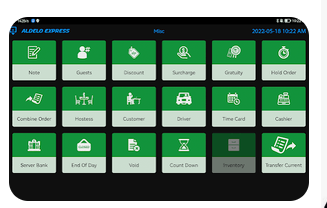
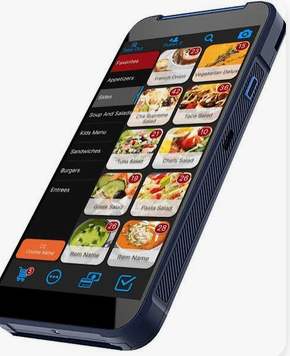
Aldelo Express screen examples

Aldelo Express tablet example with green function tiles
Express tablet functions example. Available controls depend on your assigned access and store setup; ask your trainer to demonstrate authorized tasks.
Aldelo Express handheld example showing a food menu
Express handheld menu example. Items, prices and layout shown are illustrative, not your store's current menu.

Kitchen display (KDS)

Confirm with your trainer how your store identifies an order on the KDS and handles changes. If an order appears missing, ask for help before sending it again. A clean, current KDS example and the completion/correction steps are awaiting Melissa's review.

Multi-burger items

Ask your trainer to demonstrate this task on the current system. Device-specific steps are pending Melissa's review; do not use the former button sequence.

Call-in orders

Ask your trainer to demonstrate this task on the current system. Device-specific steps are pending Melissa's review; do not use the former button sequence.

Carryout orders: customer names

Ask for the customer's name on carryout orders so the correct order reaches the correct customer. Never leave the name blank or use only a letter or placeholder.

The only exception is a server-only item, such as a beverage or soup/chili, that you obtain immediately and hand directly to the same customer you just assisted. For every other carryout order, always get the customer's name.

This exception is only about the name. Ring it, THEN bring it: enter every item before preparing or serving it.

Have your trainer show where to enter the name on your assigned Aldelo Express device.

Cashier in

Ask your trainer to demonstrate this task on the current system. Device-specific steps are pending Melissa's review; do not use the former button sequence.

Clocking in

Ask your trainer to demonstrate this task on the current system. Device-specific steps are pending Melissa's review; do not use the former button sequence.

Combination

Ask your trainer to demonstrate this task on the current system. Device-specific steps are pending Melissa's review; do not use the former button sequence.

Coupons

Ask your trainer to demonstrate this task on the current system. Device-specific steps are pending Melissa's review; do not use the former button sequence.

Delivery orders

Ask your trainer to demonstrate this task on the current system. Device-specific steps are pending Melissa's review; do not use the former button sequence.

Dine-in orders

Ask your trainer to demonstrate this task on the current system. Device-specific steps are pending Melissa's review; do not use the former button sequence.

Discounts

Ask your trainer to demonstrate this task on the current system. Device-specific steps are pending Melissa's review; do not use the former button sequence.

Orderentry

Ask your trainer to demonstrate this task on the current system. Device-specific steps are pending Melissa's review; do not use the former button sequence.

Ordertype

Ask your trainer to demonstrate this task on the current system. Device-specific steps are pending Melissa's review; do not use the former button sequence.

Refunds

Ask your trainer to demonstrate this task on the current system. Device-specific steps are pending Melissa's review; do not use the former button sequence.

Settling checks

Ask your trainer to demonstrate this task on the current system. Device-specific steps are pending Melissa's review; do not use the former button sequence.

Signature

Ask your trainer to demonstrate this task on the current system. Device-specific steps are pending Melissa's review; do not use the former button sequence.

Specials

Ask your trainer to demonstrate this task on the current system. Device-specific steps are pending Melissa's review; do not use the former button sequence.

Splitting checks

Ask your trainer to demonstrate this task on the current system. Device-specific steps are pending Melissa's review; do not use the former button sequence.

Voids

Ask your trainer to demonstrate this task on the current system. Device-specific steps are pending Melissa's review; do not use the former button sequence.

Customer pays with a gift card

Complete the approved redemption on the current gift-card terminal before applying that amount to the POS bill. Collect any remaining balance separately. Follow the current T650 Gift Card Process for balance inquiry, redemption and receipts.

Selling or reloading a gift card

Ring and collect payment in the POS before loading the card. Use the new-card instructions or existing/zero-balance card reload instructions, as appropriate. Do not repeat a sale already paid for. Terminal commands are maintained in that shared reference.

Smart Safe

Making DepositsImage of Safe Panel

  1. Enter your personal safe number and PIN.
  2. When the lights on the bill readers turn green, feed with cash.
  3. When done, press the Quit/Save button.

Closing the Shift

Make the final deposit for the shift, then:

  1. Enter your personal code and PIN.
  2. Select #5 (Reporting)
  3. Select #5 (Shift Report)
  4. Select #1 (Current business day)
  5. Select #1 (Print report).
  6. After the receipt prints, press the cut button. The receipt will show all of the money you dropped for the shift.


Other POS tasks

Repeat the order back to the customer and check it for accuracy. Webb Bucks, split payments, transfers, table or order-type changes, tip adjustments and end-of-day procedures require confirmed current instructions. Ask your trainer for help; these procedures are pending Melissa's review.

SECTION 6.2

Cashiering procedures

When you are the cashier, you'll need a few minutes to get things ready. So please arrive by 10 minutes to the hour and clock in so you get paid for the time.

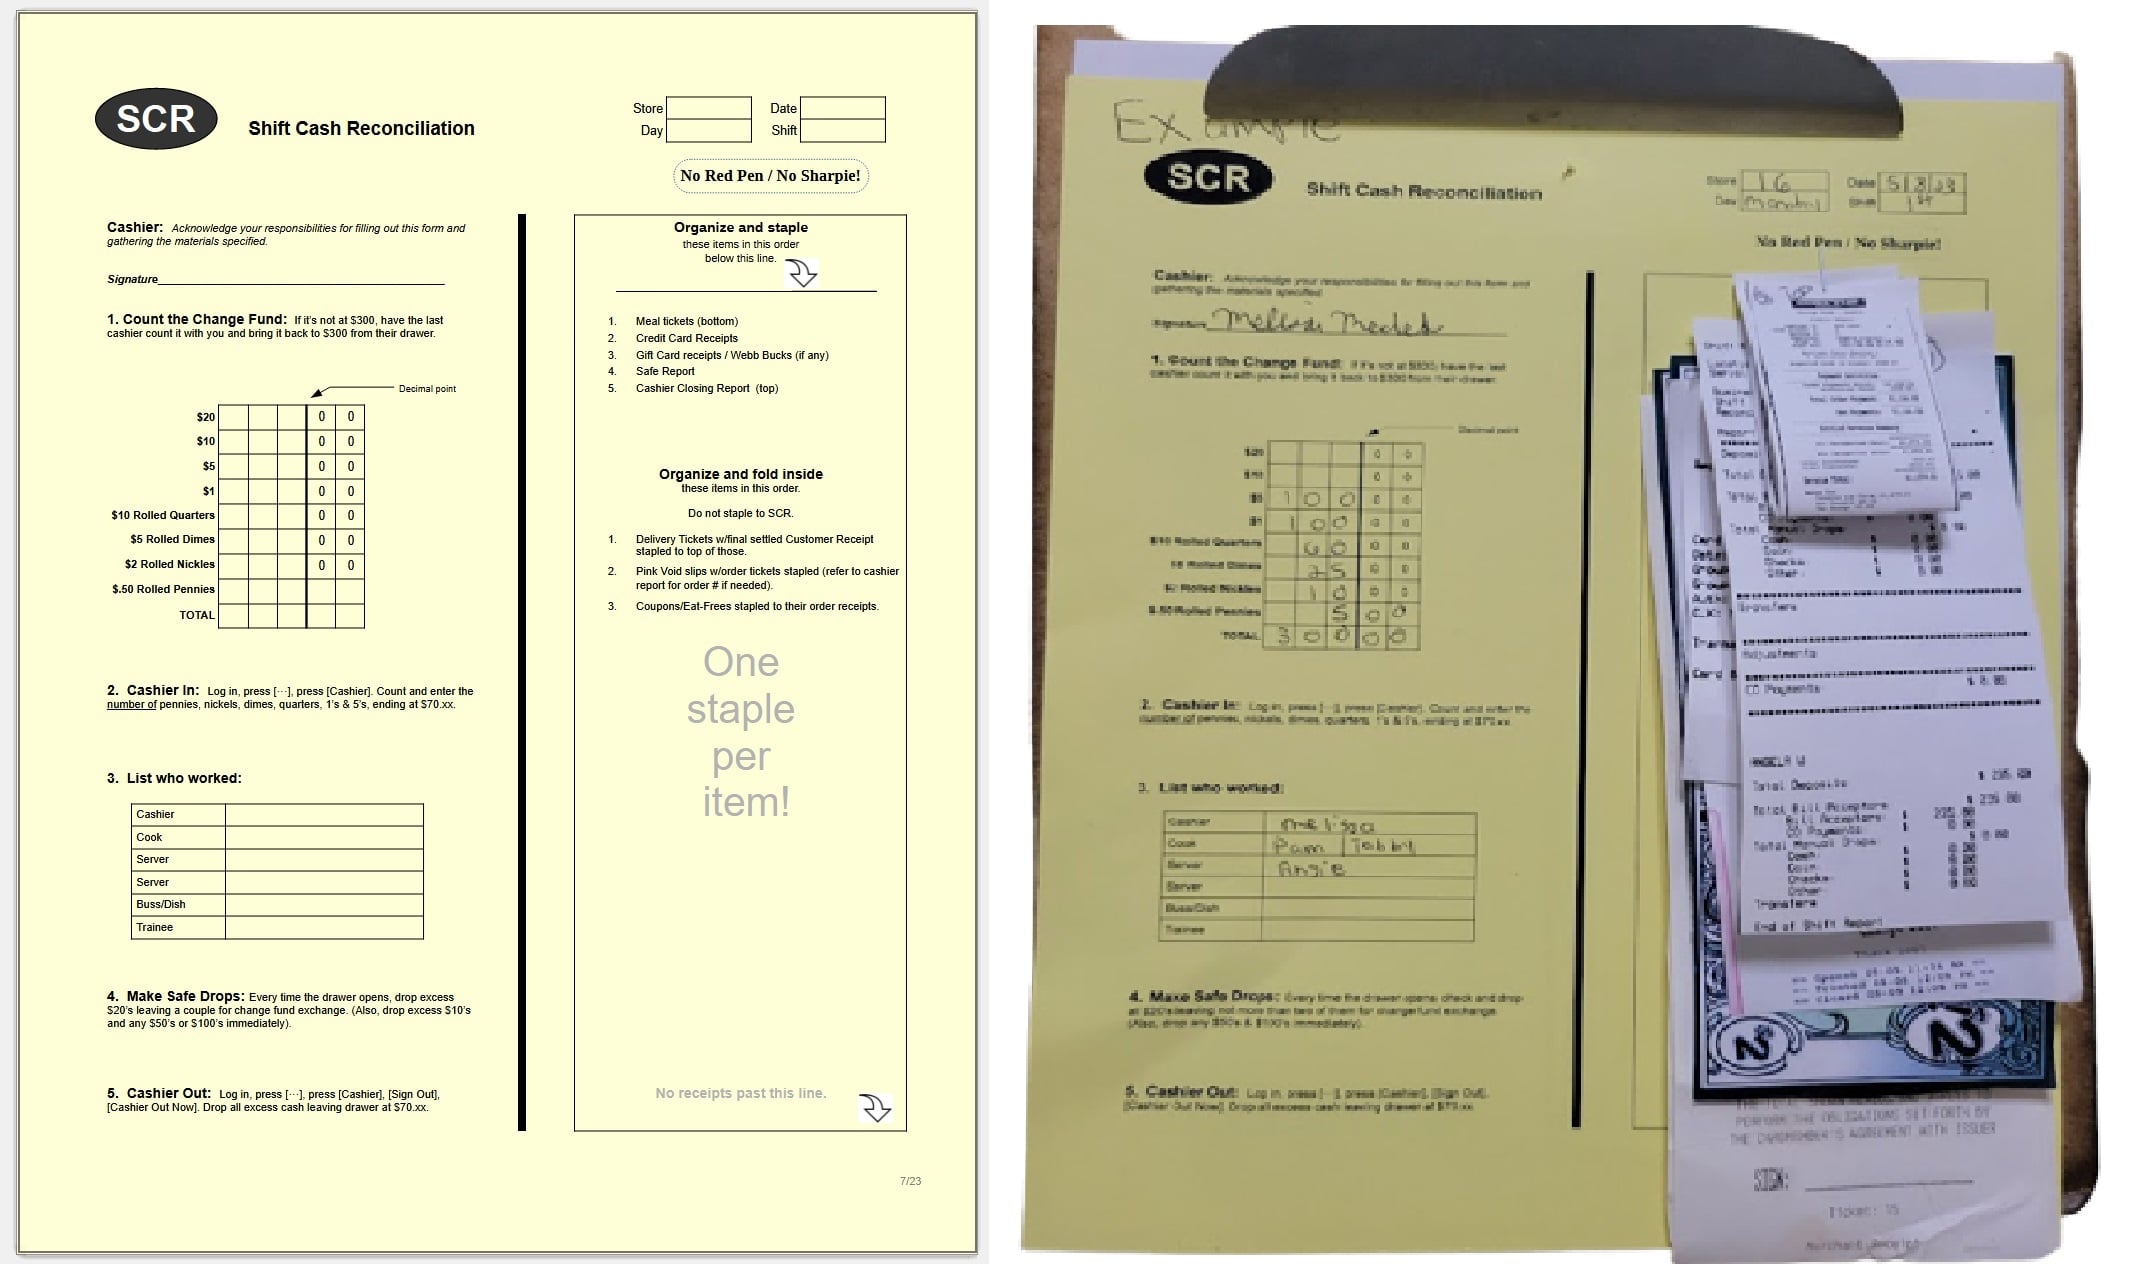
The SCR

Grab a new SCR form and fill it out as follows:  Sign it at the top. Write in the store, day, date, and shift. Count the "Change Fund" and list it. List the employees on the shift.

Later, as you begin to take orders, list the first Ticket # for the shift. Then you'll collect receipts and other forms for the shift for attaching and including later on.

The SCR illustration is not included in this review. Follow the instructions on the current SCR form.

Cashier In

Count the cash and coins in the drawer and record the opening amount using the current cashier procedure demonstrated by your trainer. The exact device-specific sequence is pending Melissa's review. See the current POS basics.

If Change Fund or Cash Register is Short at Beginning of Shift

  • Count a second time
  • Have another person count with you.
  • Note the discrepancy on the SCR
  • Bring the change fund and/or drawer back to $300 or $75 during the shift. (This may cause your deposits to be short resulting in a short SCR, but the auditor will know why because you noted it.)

Cashier Out

Account for the closing cash, complete the final safe drop and retain the safe report. Ask your trainer to demonstrate the current cashier-out procedure; its device-specific sequence is pending Melissa's review.

Finalize the SCR per the instructions on the SCR.


SECTION 6.3

Shift Cash Reconciliation (SCR)


The "SCR" (Shift Cash Reconciliation) Form


The "Cashier" for the shift is responsible for the SCR, including filling it out, and for organizing and attaching the receipts and other papers as described and shown here. The cashier is further responsible for:

  1. Counting the change fund at beginning of the shift;
  2. Confirming that the drawer is equal to the amount the last shift claims;
  3. Ringing cash and making change correctly;
  4. Making safe drops during the shift
  5. Counting down the drawer to $70.xx at the end of shift;
  6. Making a final drop at end of shift.
  7. Assuring that the drops for the shift plus the last drop equal the cash sales for the shift.

Taking on the role of cashier means you are responsible for the drawer and the paying back of any shortages that might occur. We carefully audit the activity before presenting anyone with a request to pay back shortages. However, do keep in mind that we do not operate the cash register. It is your responsibility to keep it in balance by taking care to count the cash and handle it properly as described above.

Image of SCR


SECTION 6.4

No-sale procedure

No Sales


SECTION 6.5

Tip handling

Tips are the property of the employees who earn the tips. However the company has established rules for the collection, storage, and handling of tips as follows.

Tip Pool

The cash tips left by customers are pooled together and shared equally by the number of servers/cooks on duty. This pooling arrangement is because of the openness of our operation, and the cross-training, and cross-service where servers and cooks work as a team to take orders, prepare food, collect payment, do shift duties, and dishes.

Collecting and Storing Tips

1) Every tip must go immediately into the tip pool container upon collection.

2) Even if a customer says "this tip is only for you", simply say "thank you" and after the customer is not looking, deposit the tip in the container.

3) Tips must be carried in the hand in plain open view - never in your pocket.

4) The tips remain in the container throughout the shift.

Splitting Tips

1) Tips are split equally as follows and at these times:

  • at end of the shift when everyone agrees it is time to split the tips;
  • whenever someone comes on shift, while the shift is in progress (such as for a short shift);
  • in the event someone goes home early;

2) at least two individuals will do the splitting (or by one person with mutual agreement by the others).

Don't Do Suspicious Things If You Want the Respect of Your Coworkers

  • Stay out of the tip container during the shift, other than to deposit tips in it;
  • If you want to make change from the tip container, example breaking a $10, do it via agreement of the others on each such occasion. Hold the bill in the air, announce your intentions, and ask if it is OK. If it's not OK, don't do it. We have a change-fund safe for that purpose.

Don't Appear Greedy to Coworkers or Customers

  • Don't hang around past end of shift just to get the tip from someone that you took the order for but hasn't left their tip yet;
  • Don't discuss tips with coworkers in front of customers;
  • Don't ask or hint around for tips;
  • Don't say things to customers like "for a tip I will give or do such-and-such for you".


SECTION 6.6

Gift card terminal instructions

Use the current Verifone T650 Gift Card Process below. It is read from the same reference linked on the Server Tablet, so terminal instructions are maintained in one place.

Keep the operations distinct: redeem approved value before settling a bill; collect payment before issuing a new card; use RELOAD for additional value on an existing card, including a zero-balance card. Never collect payment a second time merely because PURCHASE displayed “Activate Not Allowed.”

Use the Verifone T650 Heartland terminal to check or change card value. Use the POS to record the customer's sale and payment. Follow the operation that matches the request.

Customer Pays with a Gift Card

Gift card terminal

Complete all three parts to prevent a register shortage. Check the balance and complete the redemption on the gift card terminal before settling the bill in the POS.

1. Check the available balance

  1. Tap BALANCE INQUIRY.
  2. Swipe the gift card, or tap [#] to enter the card number manually, then tap the check mark [✔].
  3. Read the displayed balance. The terminal displays an approval message and prints merchant and customer receipts.

2. Redeem the amount on the gift card terminal

  1. Tap REDEEM.
  2. Enter the amount to redeem, then tap [✔]. Do not exceed the available balance or the amount due.
  3. Swipe the card, or tap [#] to enter the card number manually, then tap [✔].
  4. Confirm the approval message. The terminal prints merchant and customer receipts. Keep the merchant redemption receipt for the SCR and give the customer their copy.

If redemption is not approved, do not record a gift card payment in the POS. Ask the manager for help.

3. Settle the bill in the POS

Apply the approved redemption amount to the POS bill using the Gift Card payment option. If a balance remains, collect it by cash or credit card and record that payment separately.

Customer Buys a Gift Card

For a new card, follow the PURCHASE steps below. To add money to a previously used card, including one with a $0 balance, follow Reload an Existing Gift Card.

Gift card terminal

Complete both parts. Finish the gift card purchase in the POS before loading the card on the gift card terminal.

1. Ring the sale and collect payment in the POS

Ring the gift card under Supplemental / Retail for the amount the customer is purchasing. Collect and record the customer's cash or credit card payment in the POS.

2. Activate and load the gift card

  1. On the gift card terminal, tap PURCHASE.
  2. Tap the amount, or tap CUSTOM and enter the amount paid for in the POS.
  3. Swipe the gift card, or tap [#] to enter the card number manually, then tap [✔].
  4. Confirm the approval message. The terminal prints merchant and customer receipts. Keep the merchant receipt for the SCR and give the customer their receipt and loaded card.

For a previously used card, including a zero-balance card, use RELOAD. If PURCHASE displays “Activate Not Allowed,” follow the reload recovery instructions below without charging again.

If loading is still not approved, ask the manager for help before giving the card to the customer as activated.

Customer buys multiple cards with the same value

Use MULTI-PURCHASE to load the same amount onto up to 10 cards. First ring and collect payment for all cards in the POS.

  1. Tap MULTI-PURCHASE.
  2. Enter the number of cards (10 maximum), then tap [✔].
  3. Enter the amount to load onto each card, then tap [✔].
  4. Continue with the PURCHASE prompts above for the cards. Confirm approvals and keep the receipts.

Reload an Existing Gift Card

Use RELOAD when a customer adds money to a previously used gift card. This applies whether the card still has money on it or has a $0 balance.

Load only the additional amount the customer is buying. For example, if a card has $5 remaining and the customer buys $20 more, enter $20 as the reload amount, not $25.

1. Ring the added value and collect payment in the POS

Ring the additional gift card value under Supplemental / Retail. Collect and record the customer's cash or credit card payment in the POS. If the sale and payment are already recorded, do not ring the sale or collect payment again.

2. Reload the card on the gift card terminal

  1. Tap RELOAD.
  2. Enter the additional amount paid for in the POS, then tap the check mark [✔].
  3. Swipe the existing gift card, or tap [#] to enter the card number manually, then tap [✔].
  4. Confirm the approval message. Keep the merchant receipt for the SCR and give the customer their receipt and reloaded card.

If PURCHASE displays “Activate Not Allowed”

Attempting PURCHASE on a previously used $0-balance card produces Activate Not Allowed. Use RELOAD instead and follow step 2 above for the amount already paid for. Do not charge the customer a second time.

If the reload is not approved, ask the manager for help before giving the card to the customer as loaded.

Help / Instructions

Use REDEEM for a customer paying a bill. ADJUST / SUBTRACT VALUE is a separate value adjustment function. Ask the manager before using adjustments, transfers, or voids.

Reprint a receipt
  1. Tap the menu icon (≡), then REPRINT.
  2. Tap LAST for the most recent transaction, or LIST to find a different transaction by number or in the transaction list.
  3. View or select the transaction, then tap MERCHANT COPY or CUSTOMER COPY.
Manager setup and administration reference

Terminal setup and identifiers are not reproduced in this trainee view. Managers can use the existing Gift Card Process manager reference. Its existing access and content remain unchanged.

CHAPTER 7

Working together on every shift

5 sections

SECTION 7.1

Shift-duty tablets and rotating deep cleans

The review selectors assemble the named source variants for learning. The operational time-switch configuration has not been independently verified in this review.

The cook and server tablets are working checklists for the shift. Some duties repeat every shift; others change by day or shift. Read the current list rather than relying on memory or yesterday’s screen.

Study cook duties without submitting · Study server duties without submitting

Start the shift with the current checklist

  1. Reload the station page and check the displayed date and shift.
  2. Read the task names, instructions and “When” column. Touch a red task name to open its detailed procedure.
  3. Identify the day’s deep-clean item and any shift-specific tasks. Deep-clean items are scheduled for the first hour on the current checklists.
  4. Begin prep early and continue between customers. Both cooks and servers participate. Use the intake report and the shared Prep Work Item Instructions.
  5. Mark a task only after actually completing the work. Submit the checklist with your own five-digit POS number.
  6. Tell the trainer or manager about work you could not finish, and communicate it during the handoff.

Daily deep cleans rotate through the week

Each station has a different deep-clean assignment for each day. The existing manual describes a daily switch at 6:05 AM, Central time, so the workday’s deep-clean change occurs then rather than at midnight. The table below shows the rotation in the supplied station-duty files.

DayKitchenServer area
MondayKitchen RefrigeratorOrange Juice & Hot Chocolate Machines
TuesdayKitchen FreezerSoda Machine & Ice Bin
WednesdaySyrup Warmer & Bread LoweratorCoffee Machine, Pots, & Coffee Cups
ThursdayUnder Griddle & Under Egg StoveJelly Caddies and Mustards
FridayEggs Stove Grates and Tray UnderneathExchange Sugar Jars
SaturdaySoup StoveMenu Holders and Menus
SundayPrep Table and Omelet Top RefrigeratorTable Tent Holders

Use the detailed instructions linked from the live checklist for the actual method. This overview names the assignments; it does not replace those instructions.

Some duties also change by shift

  • 6:05 AM: the first-shift soup and soup-station instructions and first-shift meal-break content are placed on the checklists.
  • 2:05 PM: the second/third-shift soup and soup-station instructions, second-shift meal-break content and second-shift fryer duties are placed on the checklists.
  • 10:05 PM: the fryer-duty insert is cleared and third-shift meal-break content is placed on the checklist.

The second-shift fryer insert calls for daily filtering, with one fryer changed Tuesday and the other Friday. Follow the live fryer instructions for the method. If a screen has been left open, reload it to display the current inserts. Report a list that appears not to have switched to the manager.

References across the top

The server tablet links to menu references, important phone numbers, safety procedures and the gift-card process. The cook tablet links to menu references, carryout packaging, batch recipes, phone numbers and safety procedures. Learn where these are and use them when you need the company method.

Practice this with your trainer

  1. Show today’s date, shift and deep-clean assignment.
  2. Open one task’s detailed instructions and explain when the work is due.
  3. Locate an outstanding prep item on the intake report and find its instructions in the shared grid.
  4. Complete real work together, then show how you record and submit only completed tasks.
  5. Explain what you would do with unfinished work at the end of the shift.

Reading this section does not complete the shift duties or certify tablet use. Your trainer observes the work and records your progress separately.

7.1 · Shift-duty tablets and rotating deep cleansContents ↑

SECTION 7.2

End-of-shift handoff

Customer Service is the Priority Even at End of ShiftSign

While you want to go home, your focus must remain on the customers until the last moment of the shift. We can't let end-of shift activities like stocking, cleaning, drawer count, or tips, cause customers to be ignored, or worse, told to wait until "change of shift". They don't care about our change of shift!

Everyone Goes Home Together

It means that no one is permitted to rush out the door at end of shift leaving others to worry about finishing up on their own. The cook needs to make sure the server is done with his/her work, and vice-versa, including all the stocking, cleaning, and dishes front and back. THEN everyone can count clock out, count tips, and go home at the same time.


SECTION 7.3

Working alone and helping each other

Working Alone Means

To take customer orders, prepare the food, and serve the food.

Why and When

Your coworker is a few minutes late for work. Your coworker is on a bathroom break. Your coworker is on their 30 minute meal break. In some cases on some shifts in some stores, certain employees who have confidence in their skills, have agreed to work entire shift alone, rather than to see the store close for that shift.

Service We Provide (When working alone)

We provide dine-in, carryout, and delivery just like when there are two or more employees on duty.  You may put out some closed table signs, or direct people where to sit, so that people are seated in a manageable area. If the store is too busy, you may ask management to pause the delivery tablet for a period of time.

How To Do It

You may close some tables using the table closed signs so people are seated in a manageable area. Locate the "Table Closed" signs. This can also be achieved by simply directing customers to certain seats.

Communication is key so you can handle multiple customers and orders. Continually inform customers where you're at. Examples:

  • Hi, my coworker is on break so I am handling the front and back, I'll be right with you.
  • Hi, having coffee?.
  • Hi, I'm just taking this order and I'll be right with you
  • Hi, I'll be right with you after I enter this order
  • Hi, I'm just clearing this table, I'll  be right with you
  • Hi, I'm just preparing this order, I'll be right with you, having coffee?

Enter orders into the POS system just like if there are two of you, do not just make food and then enter it.

You may get payment up front if you like. Explain "I'm working alone right now, my coworker stepped away for a moment, so  would you mind if I go ahead and collect now?"

Awareness

  1. Always be aware of your surroundings
  2. Keep cell phone on you
  3. If customer makes you feel uncomfortable pretend coworker is in the back
  4. If multiple customers come in at once, get orders first, apologize in advance for any inconvenience and make order
  5. Don't be in break room stay up front.

Meal Break and Employee Meal

If you work alone for an entire shift, it will be unrealistic to take a full 30 minute meal break. So during the break window, order your meal on the POS system first, then make the food, then sit at a stool close to the action to eat your food. Under no circumstances can you take the food home with you at the end of the shift.


SECTION 7.4

Dishwashing

Shared dishes and bussing: cook and server

Work together throughout the shift. The cook can wash dishes while the server clears tables; when the cook is busy preparing orders, the server can help at the dish machine. Use the shared methods below for the tasks you perform.

A dedicated bus/dish employee has additional role policies. Those extras do not automatically become every cook or server's full job. See dedicated bus/dish role policies when that is your assigned position.

Image of Dirty DishesWho's Supposed To Do More Dishes

The cook or server?

Roughly equal. Here's what realistically happens... The cook is closer to the dish machine so can do dishes while the server buses the tables. When the cook gets busy preparing groups of orders after the server takes the orders, that's a good time for the server to do some dishes. All-in-all, both should participate and work together.

Aldridge, Inc.

Dish Procedures

1. Monitor Tables and Pre-Clear
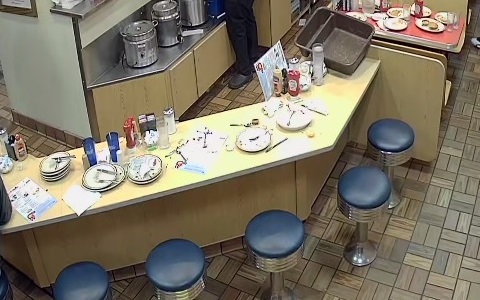
Dishes Everywhere We monitor tables and pre-clear as customers finish their plate. That way, the place doesn't look like a typhoon hit it with dirty dishes left all over the place after a rush has ended. So regularly walk through the dining area monitoring for customers who have finished their food. Approach, offering to take their plate. Keep a bus pan handy, and place the plate in it.

2. Final-Clear and Reset Table
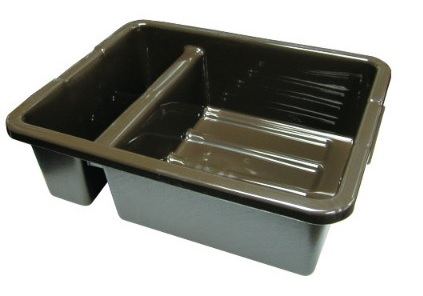
Bus Pan Image As customers leave, final clear the table. Bring a bus pan to the table. Remove all remaining dishes, cups, glasses, and silverware into the bus pan. Put placemats and napkins into the garbage, not the bus pan. Set Table After having cleared the table, reset it as follows: a) Grab a clean/sanitized terry towel from the red bucket (bucket explained later), and wipe the table; b) Set the table with placemat(s) and a table tent between the two placemats; c) Organize the table setups (condiments) as depicted.
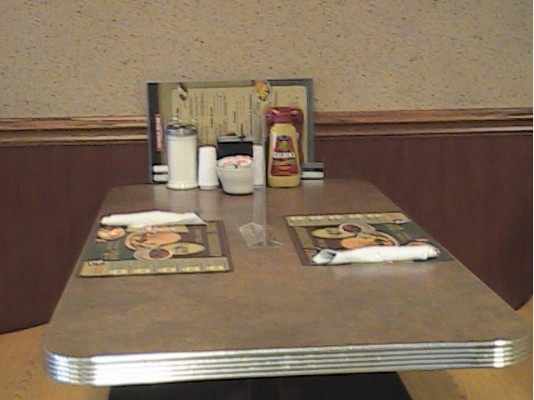
3. Bring Bus Pan to Dish Area to Sort, Rinse, Scrape, and Fill Dish Racks

Place the bus pan full of dishes to one side of the pre-rinse sink. Place an empty dish rack to the other side of the pre-rinse sink. Grab dishes one at a time. Scrape all food scraps into the pre-rinse sink opening (the disposal side)*, then rinse the dish as needed with the overhead sprayer. Scrub dishes with the overhead sprayer brush to remove caked-on food such as egg yolk. Place dishes into the dish rack. Cups and glasses go into overhead racks. Silverware goes into the silverware soak tray. Paper and straws go into the garbage. Then rinse the bus pan and return it to the area out front. *A key rule is that food scraps from plates go into the pre-rinse sink and into the garbage disposal (not into trash cans), to reduce odors and to prevent attracting bugs and pests. Guide
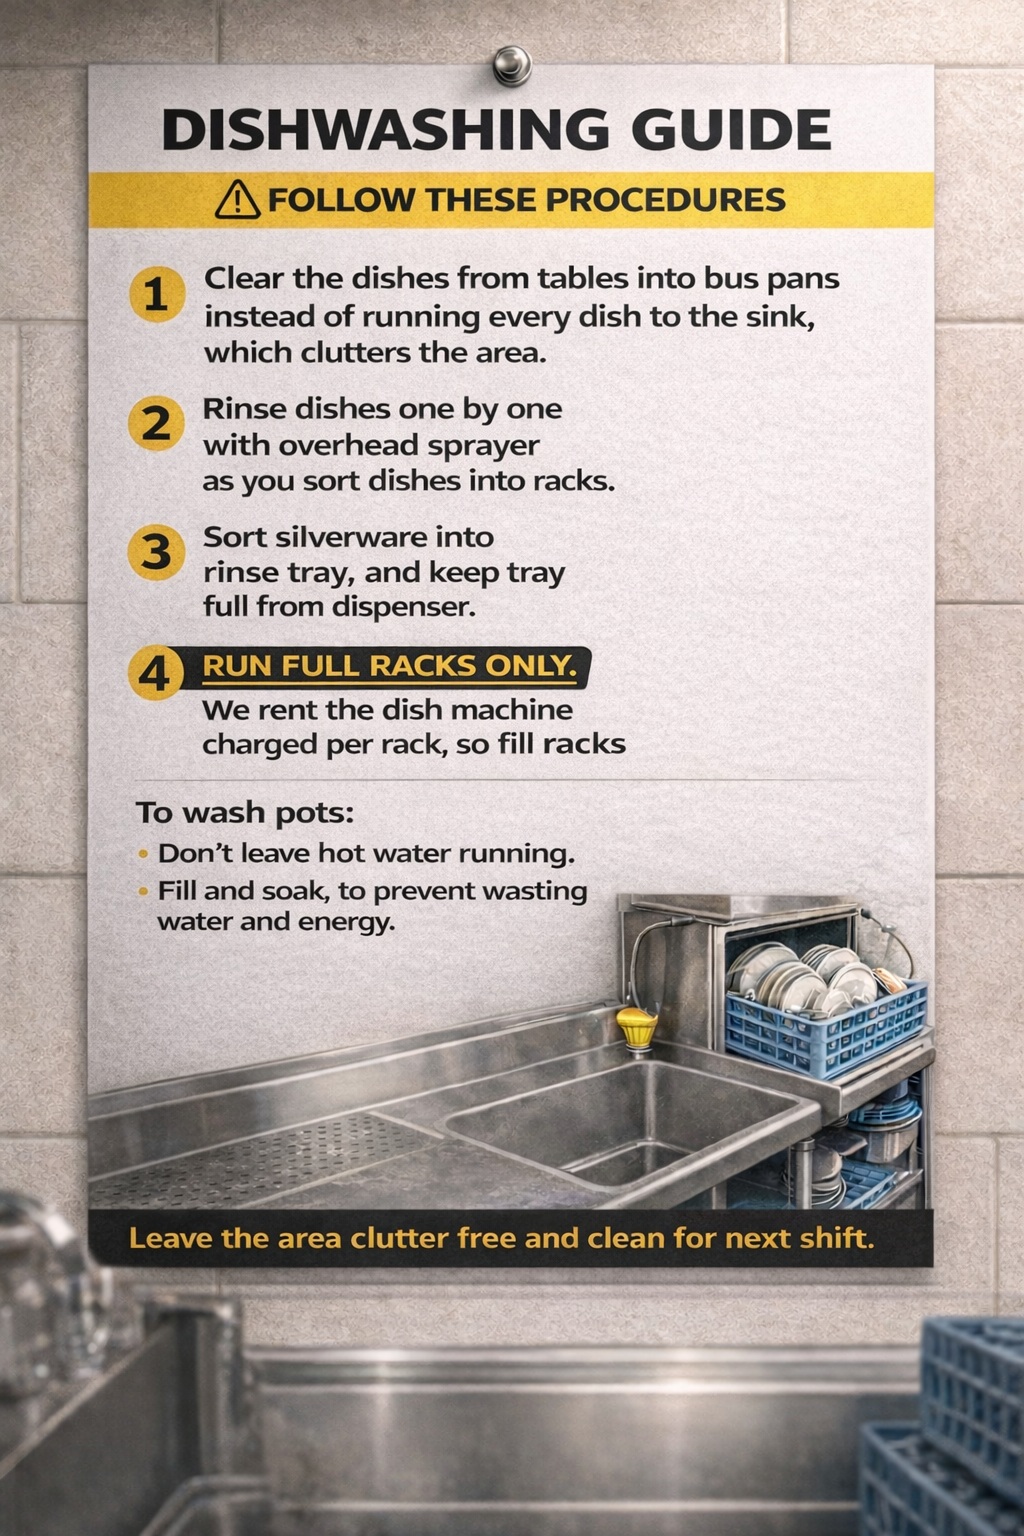
4. Run the Dish Machine

Slide the rack into the dish machine and close the door. The machine will start automatically. The machine goes through a wash cycle and then a rinse cycle. The rinse cycle contains a pre-measured amount of sanitizer that sanitizes the dishes. When the machine stops, open the door and remove the rack from the other side of the machine. Allow the dishes to cool for a moment, before moving back to storage.

5. Washing Silverware
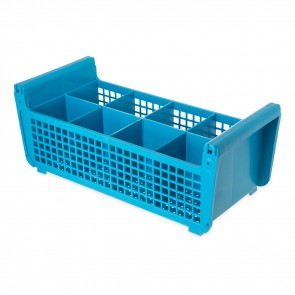
Image Allow the silverware to soak in the silverware soak tray. As the tray becomes full, locate the silverware basket as well as a flat dish rack. Place the dirty silverware into the silverware basket and place it on the flat rack. Run the machine. Refill the silverware soak tray from the dispenser on the wall for that purpose.
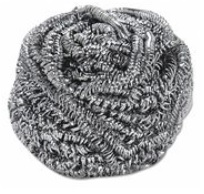
6. Miscellaneous Items

You will encounter miscellaneous items like measuring cups, tea pots, steak knives, soup pots, etc. Some pots that contained chili for example, will need to be soaked and then scrubbed with the metal scrubber before putting through the dish machine.

7. Return Dishes to Appropriate Storage Areas

When the dish machine is done running and you remove the rack from it, stack the clean dishes, then return them to appropriate areas in the kitchen and server areas. When running silverware, return the clean silverware to the clean silverware trays out front.

8. Empty and Refill Red and Green Bucket and Silverware Soak Tray

Image of Soapy Bucket
  1. Green Bucket at Dish Table: On the dirty side of the dish table, is a green bucket that is filled with warm water & soap from a dispenser on the wall near the bucket. The green bucket mixture is for washing out soiled terry cloth wiping towels. As the green bucket water gets cold or dirty, empty it and refill it from the hot water/soap dispenser.

  2. Image of Red Bucket Red Bucket at Dish Table: After swishing out a terry cloth towel in the green bucket, sanitize it in the mixture in the red bucket. The red bucket contains warm water and sanitizer mixed to the required concentration. Not less than every two hours or as the red bucket water gets cold or dirty, empty it and fill it from the dispenser.

  3. Red Bucket at Customer Counter: There is a second red bucket with the warm water/sanitizer mixture that is kept on the bottom shelf of the customer counter. Monitor this red bucket as well, emptying and refilling it every two hours or more as needed.

9. Food Scraps & Garbage Disposal Rule (Very Important)

Food scraps from customer plates must go into the garbage disposal, not into trash cans. This reduces odors and helps prevent attracting bugs and pests. Trash cans are for non-food waste only (paper, wrappers, plastic, straws, etc.). If you are unsure whether something should go into the disposal, ask the manager on duty.

10. Operating the Garbage Disposal
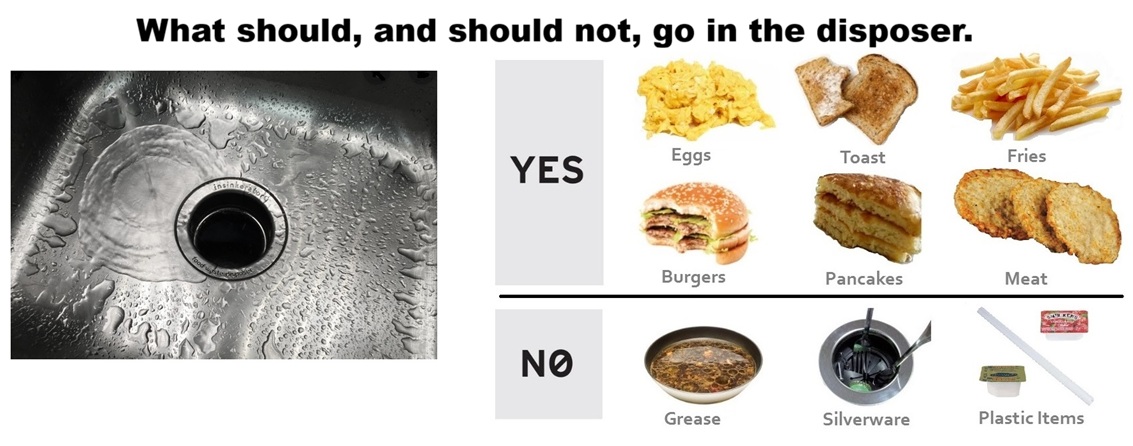
Garbage Disposal The pre-rinse sink has a garbage disposal. As you dump food scraps from plates, and scrub and rinse the plates with the overhead sprayer, run the disposal periodically so food does not build up in the sink.

  1. Turn water on first: Use a steady flow of water while the disposal is running.
  2. Run disposal in short bursts: 3–5 seconds as needed while scraping/rinsing, and again at the end of a rush.
  3. Keep hands and tools clear: Never place your hand into the disposal opening.
  4. Prevent silverware accidents: Watch for forks, spoons, knives, ramekins, and small items. Do not allow any silverware to enter the disposal.
  5. If it jams or sounds wrong: Turn it off and notify the manager immediately. Do not keep forcing it.

11. Keep Dish Tables Cleared and Wiped Down

Connected to the dish machine, is a dirty side dish table on one side, and a clean side dish table. Clear the dirty side by washing the dishes. Clear the clean side by returning the clean dishes to storage. Wipe down both sides periodically, the dirty side with a wiping towel from the green bucket, the clean side with a sanitized wiping towel from the red bucket.

12. Empty Dish Machine Scrap Tray

There is a food scrap tray under the dish machine. Pull the tray at end of shift and empty the contents into the sink/disposal side as directed. Return the tray.

13. Chemicals

There are several chemicals in use. Monitor and refill if needed. For the dish machine, there are solid chemical containers on the top of the machine. Also for the dish machine, there is a bleach/sanitizer container located near the dish machine. It won't likely to go empty but be aware of it. There also is a wall-mounted container that feeds the red bucket dispenser. If this goes empty, get a new container as directed. (Be sure to save and reuse any special cap or adapter required for the dispenser.) There are solid chemical dispensers on the wall for the green bucket soap dispenser and another for the silverware soak tray dispenser.

14. Sweep the Kitchen and Dining Room

Another duty is to sweep up periodically. Monitor the floor in the kitchen and the dining area. As needed, locate the broom and dustpan. Sweep up and collect dirt in the dustpan. Empty the dust pan into the garbage.

15. Empty Garbage Containers

Towards the end of the shift, empty the garbage containers. There is one large container in the dish machine area, and smaller containers in the kitchen and server areas. When you empty the garbage bags, tie the bags and put them where the garbage is stored in the back room. Also get new garbage bags to replace the ones you emptied. Ask where those are kept.

Reminder: If an employee is unsure about any step, ask the manager on duty. These procedures are part of your training and are required.



SECTION 7.5

Dish position

Aldridge, Inc.

Shared dishwashing and bussing methods

Use the shared 15-step dishes and bussing methods for table clearing, washing, sanitizing, drying, storage and end-of-shift care. The complete method is maintained there once.

The supplemental policies below apply to the dedicated bus/dish position. They do not assign that position's full duties to every cook or server.


Supplemental Handbook Policies Specific to Bus/Dish Position


1. Tips on Tables

Tips that are left on the tables by customers are the servers tips. Point out the tips to the servers, and allow them to collect the tips for deposit into their tip pool container. If the server(s) tell you you can remove the tips from the tables and deposit those into the tip pool container, that is fine. However, unless on each time you work, this has been explicitly clarified with each of the servers on duty, do not collect the tips, leave the tips on the table.

2. What to Tell Customers if They Ask You for Something

If tending to customer's request is something you have been taught to do, and the servers agree that you may assist, then go ahead. However, if not, politely explain that you are a busser and will alert their server.

3. Help Resupply Kitchen or Server Supplies

If the cook or server instructs you to get certain supplies from the storage room or the walk-in refrigerator or freezer, do so asking for help in identifying items until you become familiar with things.

4. Make Yourself Useful - No Sitting Around or Leaving the Workplace

This is not a job to stand around or go outside during the work day. At all times you should be monitoring tables and finding things to do. Also do not stand around looking at your phone. Also, do not sit down during the workday, except that you may take a 15 minute meal-break described later. If customer tables are all cleared and reset, and the dishes all washed, then ask the server or cook for things that you can do for them. If there is nothing to do, then stand at the dish machine area in waiting or monitor tables out front.

5. Compensation

Your pay is an hourly wage that is paid to you via direct deposit every two weeks. Another part of your compensation is $3.00 per hour which is "tipped-out" to you from the servers tip pool. At the end of the shift, look to the server/cook who is sorting and dividing the tips to provide your share to you. For reference, on a 9 am- 2 pm shift (five hours),  you should receive $15.00. As you clock out, report the tips you received.

6. Uniform

Image of White ApronFor this position, please wear the following uniform items:
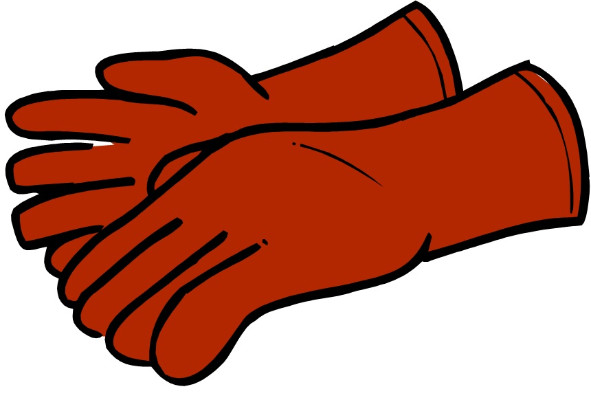
  • Company provided white bib apron
  • Company provided George Webb black visor or hat
  • A nicer black t-shirt with no logo or advertising, or a black polo, or black button down shirt or blouse.
  • You'll provide black food service slip resistant shoes
  • You'll provide black slacks or black jeans (not blue jeans).

7. Breaks

You can have a couple of beverage breaks, and a 15 minute meal-break as follows:

  1. Beverage Breaks & Beverages:  A couple of brief beverage breaks is allowed per shift. These may include a free beverage described as:
    • Free coffee or fountain soda.
    • Not free, is hot chocolate, cappuccino, juices, Sprecher rootbeer, bottled water, or lemonade.
    • If you use a disposable cup, please conserve it by using it through the shift marking your name on it if necessary.
    • A constant supply of free beverages at your side is not the intention of the free beverage policy.
    • Keep your beverage in employee break area, not out front in the dish area.
    • The free beverages described, ends when you clock out. We do  not permit a free carryout beverage at the end of the shift to take with you.

  2. Employee Meal Policy:  We provide a discounted meal per shift you work. Take 15 minutes for this during the shift, or come in early before the shift if you like. When you are ready to have your meal, here are the procedures:
    • The meal is half-price.
    • Along with the meal, you may order the not-free beverages listed earlier, if you like.
    • Have a server assist you in ordering the meal.
    • Do not prepare the food yourself.
    • Pay for the meal at time of order.
    • Order the food, have it prepared for you, and then go on break when it is ready
    • Have the meal in the break room, not in the customer area
    • Order only what you can eat during your 15-minute break because what you do not finish cannot be taken home.


CHAPTER 8

Food safety & personal safety

7 sections

SECTION 8.2

Personal safety

Avoiding Burns

Image of Neoprene Gloves

Burns and scalds can be caused by griddle, fryers, stoves, toaster, hot utensils, boiling liquids, hot pots, steam, hot foods.

  1. Wear Neoprene safety gloves when the cleaning the fryers and the griddle
  2. Assume all pots and metal handles are hot
  3. Allow fryer grease to cool to 160 degrees before filtering or disposing
  4. Do not leave metals spoons in pots while cooking
  5. Do not overstretch to reach an uncomfortable distance

Slips and FallsImage of Wet Floor Sign

Observe the following rules to prevent slips and falls:

  1. Wear the proper shoes
  2. Keep floors clean and dry
  3. Use warning signs for wet floors
  4. Point out spills to others and immediately proceed to mop up

Shoes Image of shoes

Shoes with the following attributes must be worn for safety reasons.

  • Slip-resistant soles with a good tread
  • No leather or smooth soles
  • No open-toed shoes

Proper Lifting Image of Proper Lifting

  1. Size up the load
  2. Back strait - butt out - head forward
  3. Bend at knees
  4. Lift

Knife Safety

Image of Knife Use
  • Keep item you are cutting on the cutting board - not up in your hand
  • Cut away from body
  • Keep thumb and other fingers out of the way

Fryer SafetyImage of Fryer

  • Never spill water into fryer
  • When filtering or changing oil:
    • turn fryer off and allow the oil to cool to 160 degrees before handling the oil
    • wear Neoprene safety gloves
    • do not attempt to lift a full pot of oil, use small ladling pan instead
    • do not stand on a ladder or step-stool for filtering or changing hot fryer oil
    • follow fryer oil filtering and fryer oil changing instructions on the shift duties tablet

Non-Escalation Policy

A positive outcome for any interaction with a disruptive customer is what we want. It is therefore vitally important that you do not "engage verbally" with or react to disruptive customers in a way that might escalate the "situation". Remain calm, do not argue, and never engage physically with anyone.

No Hats, Hoodies or Sunglasses Policy

Image This purpose of this customer policy is to add another layer of protection. For those customers who fail to notice the sign, politely say "for safety reasons, please remove your hat, hoodie, and/or sunglasses".
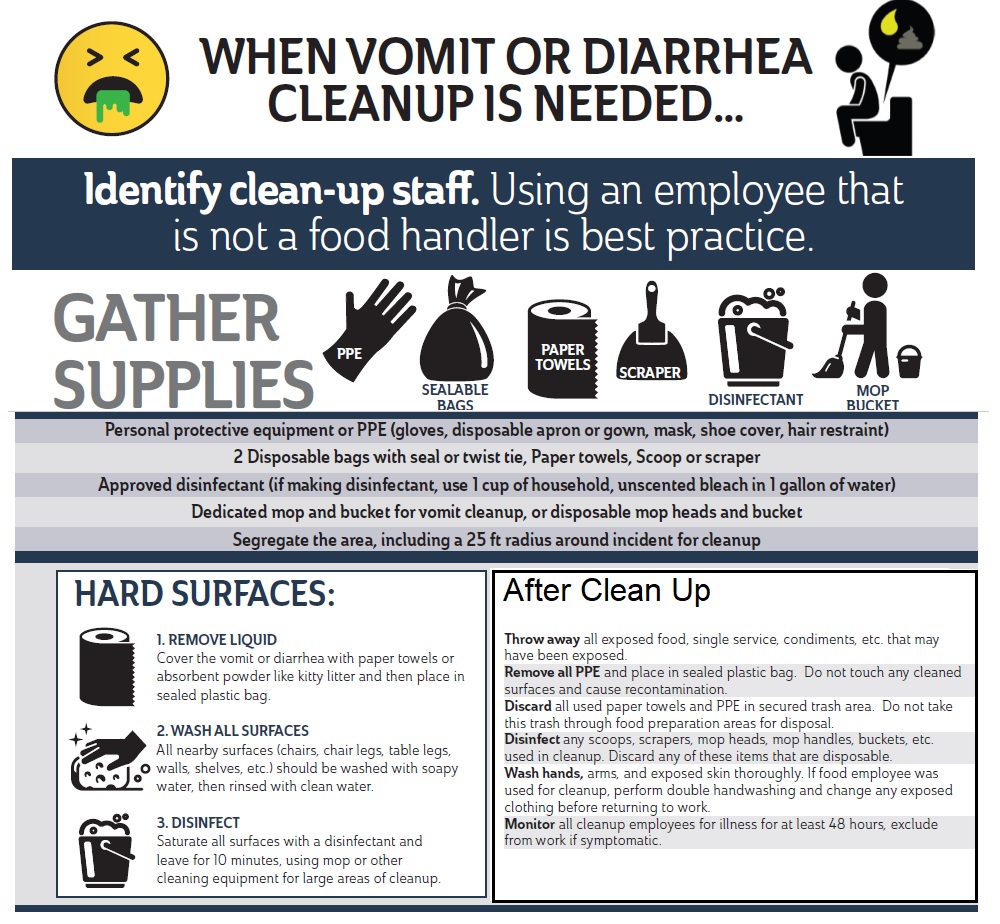


Cleaning a Vomit or Fecal Incident

Image


Emergency Procedures

Media RelationsImage of News Reporter

Our reputation can be harmed by an improperly handled news story. Therefore at no time are employees authorized to speak to a member of the media including giving any information to TV, radio or newspaper reporters without specific authorization by company president, Tom Aldridge.

If a reporter and/or camera person enters the restaurant, politely inform them that they must leave their contact information or contact company president, Tom Aldridge at (414) 271-5050.

Foodborne Illness

If a customer contacts your location claiming to have become ill as a result of eating our food, contact your store manager immediately.

If there is a clearly identified product that is the suspected cause, take possession of the product, including the container that the food came in, if available.

Let the customer know that management will be in contact with them. DO NOT admit any guilt or responsibility, as the complete situation may NOT yet be clear.

Contact your store manager with the information that you gathered.

Customer Injury

If the injury is life threatening, call 911.

Gather as much information as possible about the incident as follows:

  1. What exactly happened?
  2. When and where did it happen?
  3. What was the customer doing at the time it occurred?
  4. Were there any witnesses?
  5. Customer's Name and Telephone Number.

Important things to remember when interacting with an injured customer:

  • Do not put yourself in danger trying to provide aid
  • Stay calm, as the injured person may be in shock or disoriented
  • Stay with the injured employee; let them know that help is on the way
  • Use disposable gloves when blood or other bodily fluids are present
  • Contact your manager

Image of First Aid Sign First Aid Kit and Bulletin Board

Life Threatening Injury

If an injury is life threatening, call 911!

Minor Injuries

The restaurant is equipped with a first aid kit, and a first aid information board. The board has a list of the items in the first aid kit and written first aid procedures. There also is a log to fill out when you use any items from the kit.

Here below is what is posted on the first aid information board.


First Aid Kit Contents & Usage

The following listing has been prepared specifically for the needs of Aldridge, Inc. employees for self administered first aid as determined by the Occupational Medical Clinics of America and approved by Dr. Stanley Nuland, M.D. and OSHA.


Item
Instructions
Wound Care

Adhesive Bandages 1" X 3"
For minor cuts or bruises
Adhesive Bandages 2" X 3"
For minor cuts or bruises
Water-Jel Sterile Gel-Soaked Burn Dressings
For minor to severe burns. The immediate application of a gel-soaked burn dressing can reduce the chance of a higher degree burn.
Burn Jel Packets
Pain Relief for minor burns
First Aid Cream Packets
Minor cuts and burns. Antiseptic ointment to be used under a bandage for healing of minor cuts and burns.
Disinfectant Soap
Dispensers in restrooms and hand washing sinks for regular disinfecting of hands and to disinfect an area of minor injury.
Triangular Bandage
Can be used as a tourniquet to stop bleeding or to hold a compress in place or as a sling.
Compress, 5" X 9"
As a bandage for larger cuts or burns or to reduce bleeding when used along with triangular bandage above.
Medication

Acetaminophen, Tylenol-type
To reduce pain and swelling after injury. (Not for everyday headaches.)
Other Items

Zip-lock plastic bags
To hold ice cubes to create a cold pack used to reduce swelling.
Paper cups - 5oz.
For emergency eye wash
Body Fluid Disposal Kit
For safe disposal and handling of blood or other body fluids. Refer to instructions on kit.
Vinyl gloves (located in kitchen)
For handling blood or other body fluids.
CPR Barrier Shield
To protect when giving mouth-to-mouth resuscitation.
First Aid Treatment Log
For creating a record of each use of the first aid kit.


First Aid Procedures

Who should give first aid?

If an injury requiring first aid occurs, self-administered first aid is advised. Never administer first aid to another person, nor have anyone else administer first aid to you.

What may be given?

The first aid supplies to be used for treating burns, cuts or other minor injuries common to food preparation and handling are found in the first aid kit.

When should first aid be given?

Administer first aid as soon as possible after the injury occurs.

Where should first aid be given?

Give first aid only in areas away from food preparation.

Why should first aid be given?

To prevent infection and promote healing.

What to do if injury goes beyond self-administered first aid?

  1. If injury is an emergency or is life threatening, dial 911.

  2. If injury is not an emergency or life threatening but still needs medical attention, report the incident to the manager, then seek treatment with your own doctor or the walk-in clinic listed on the First Aid information board.

  3. After receiving medical treatment, report the prognosis to the Aldridge, Inc. Office (271-5050).

In Case of Robbery!

Your personal safety is our number one concern.

Before

  1. Know your surroundings and note changes in the environment
  2. Greet every customer and use direct eye contact
  3. Trust your "gut" feeling and instinct
  4. If you are suspicious of a someone's behavior, alert other employees if possible.
  5. Be aware of people monitoring business activity, nervousness or loitering.

During

  1. Remain calm
  2. Do exactly what the robber tells you to do
  3. Do not attempt to argue in any way
  4. Do not make sudden moves
  5. Make mental notes of suspect (description from head to toe, scars, odors)

After

  1. Press the silent holdup button immediately after the robber(s) have left the premises*.
  2. Write down mental notes as soon as possible
  3. Protect evidence that may be have been touched by the suspect (counter tops, demand notes, shoe prints).
  4. Call 911 even though you have pressed the silent holdup button.

*Silent Holdup Button

Each location is equipped with several hidden holdup buttons as follows:

  • Kitchen
  • Employee meal counter
  • Manager office

Ask to be shown exactly where the holdup buttons are and how to use them.

Button Procedures:

  • Do not make any sudden moves toward the button during a robbery.
  • Press the button after the robber(s) have left the premises.
  • Never press the holdup button for general customer disturbances!

Utility Emergency

Electric Outage

  1. Contact WE Energies at (800) 662-4797 to report and/or learn the time power will be restored.
  2. Contact your Store Manager to report the outage.

Gas odor or suspected gas leak

  1. Leave the store immediately and direct all employees and customers to leave.
  2. Do not investigate the source, turn gas valves, or extinguish pilot lights before leaving.
  3. Do not operate light switches or use a phone in the affected area.
  4. From another location, call We Energies at 800-261-5325.
  5. Contact your Store Manager after reaching safety.

Source: We Energies: Natural Gas Leaks and Emergencies.

FireImage of Ansul Pull Ring

  1. If it is a very small fire, attempt to extinguish the fire with the fire extinguisher.
  2. If the fire is under or in the exhaust hood, consider pulling the fire suppression pull ring depicted here.
  3. If there is any doubt about your ability to extinguish the fire, evacuate all employees and customers and call 911.
  4. Exit in a calm manner through the nearest exit. Meet outside of the restaurant at the front door area. This is the emergency evacuation checkpoint.
  5. If you suspect a co-worker or customer is still in the building, report this immediately to the fire department when they arrive.
  6. Remain at the Emergency Evacuation Checkpoint until the fire department announces that re-entry is permitted.
  7. Contact the store manager.

Tornado/Severe Weather

A tornado watch is issued when conditions are favorable for the formation of a tornado. Pay close attention to media outlets any changes in the weather. A tornado warning means at a funnel cloud has been sighted. A warning siren will signal that a tornado warning is in effect.

If a tornado warning is issued, take the following steps:


SECTION 8.4

Refusing service

No refusing business. No turning customers away. No discouraging orders.

Customers are our first priority.

Every customer who comes in, calls in, or places an order is important to our business. Customers are the reason we have sales, hours, tips, paychecks, and jobs.

Turning customers away, discouraging them from ordering, making them feel unwelcome, or giving them poor service kills sales, hurts our reputation, lowers our Google review rating, and can ultimately put us out of business.

Customers come to George Webb because they want to be served. They do not want to hear about shift changes, cashiering out, grill cleaning, being short-staffed, or how busy we are. Those are internal issues. They should not become the customer's problem.

If the restaurant is open and the service is available, take the order and keep the business moving.

Do not discourage customers from ordering by saying things like:

  1. "We're too busy."
  2. "It's going to be a long wait."
  3. "We're not taking orders right now."
  4. "It's change of shift."
  5. "We already cashiered out."
  6. "You have to wait until the next shift."
  7. "The cook is cleaning the grill."
  8. "We're short-staffed."
  9. "We're not taking carryout orders."
  10. "We're not taking call-in orders."

These comments push customers away, cost us sales, and create bad customer experiences.

A customer trying to spend money with us should be welcomed, not discouraged.

If you are busy, say: "Hi, I'll be right with you."

If the customer asks about the wait, say: "We're a little busy, but we will get your order out as quickly as possible."

Do not make grill cleaning, cashiering out, shift change, or staffing issues the customer's problem. Take the order and keep the business moving.

The right approach is simple: greet the customer, take the order, enter the order, help get the food out, and thank the customer.

By signing this training, I acknowledge that I have read and understand this policy. I understand that customers are the first priority, and that refusing service, discouraging sales, or turning customers away may result in discipline, up to and including discharge.


SECTION 8.5

Service dogs

Our goal is to provide a welcoming and respectful experience for every guest.

Guests who rely on trained service dogs are welcome in our restaurant. Federal law (ADA) allows service dogs in dining areas, and we are committed to handling these situations properly and professionally.

What Is a Service Dog?

A service dog is a dog individually trained to perform specific work or tasks for a person with a disability. Examples include guiding someone who is blind, alerting someone who is deaf, assisting with mobility, or detecting medical conditions such as seizures or blood sugar changes.

Emotional support animals and pets are not considered service dogs under the ADA.

If You Are Unsure, You May Ask ONLY Two Questions

If it is not obvious that the dog is a service dog, you may politely ask only:

  1. "Is the dog a service animal required because of a disability?"
  2. "What work or task has the dog been trained to perform?"

Please remember:

  1. Do not ask what the person’s disability is.
  2. Do not ask for paperwork, ID cards, certification, or proof.
  3. Do not ask the dog to demonstrate its task.
  4. Do not argue with the guest.

There is no official certificate required for a service dog. Many legitimate service dogs may not wear special vests or markings.

Never say: “Dogs aren’t allowed,” “You can’t bring that in here,” or tell a guest they must sit outside.

Guidelines Inside the Restaurant

The service dog should:

  1. Remain under the handler’s control.
  2. Stay on the floor (not on chairs, booths, or tables).
  3. Not eat or drink from restaurant dishes.

Employees should not pet, feed, or distract the dog. Always speak directly to the guest.

If There Is a Problem

In rare cases, a service dog may need to be removed if:

  1. The dog is out of control and the handler does not correct it, OR
  2. The dog is not housebroken.

A manager should handle this situation. If the manager is not currently on duty, call the manager immediately if you need assistance or are unsure how to handle the situation. Even if the dog must leave, the guest should still be offered service.

When in Doubt

  1. Stay calm and courteous.
  2. Do not deny service.
  3. Ask the two approved questions if necessary.
  4. Contact a manager if you are unsure.

If the manager is not currently on duty, call the manager immediately if you need assistance or are unsure how to handle the situation.

Our Commitment

We are committed to treating all guests with respect and following the law. Properly handling service dog situations protects our guests, our team members, and our company.


SECTION 8.6

Bar rush service

SERVER TRAINING SUPPLEMENT

The Successful Bar Rush - 3rd Shift

The definition of a successful bar rush is: "no service problems or delays in food preparation and no customer hassles".

Working the bar rush successfully takes a skill set that you can learn. Work the following way and the rush will likely go smoothly with less tress and good tips.

  1. Be Ready:  Before the bar rush don't spend time standing around or being on your phone. Get ready by checking all the setups on the tables; stocking the paper goods and other things you need; be sure you have two full bins of silverware wrapped; dishes are washed and put away.

  2. Be Friendly and Smile:  Greet people the moment the door opens. "Hi, I'll be right there" makes a big difference. SMILE. You'll be amazed at what smiling even at people that have been drinking can do to help things go more smoothly.

  3. Be Proactive:  You're in charge out there, act like it. Be quick with service, help people to decide, telling them you're very busy and will return if they're not ready to order.

  4. Work the "System":  Don't abandon your skills during the rush. Use the 10-Steps to Customer Service.

  5. Collect In Advance All the Time:  Collect in advance for every table, every night, for every customer, all-the-time, no exceptions, even to regulars.

  6. Communicate with Customers:  Example, while your standing waiting for payment for one group, you notice new people come in or others needing service, acknowledge the other people saying "I'll be right with you as soon as I collect here".

  7. Don't Hold Back Tickets:  When taking orders, take one and put it into the system right away, then move to the next table. Never take orders from more than one table before going to the POS. It creates a bottle neck in the kitchen.

  8. Table Touch:  Be aware of who's new, who's waiting for food, who's eating, etc. As you see that food is taking quite a while, stop back and offer beverage refills and say I'll check on your order.

  9. Don't ask the Kitchen How So and So Order is Going:  It confuses the cook. Instead, step in and help on the eggs side of the kitchen and you'll readily see where the various tickets are at.

  10. Clear Tables Right Away:  A big goal is to turn tables to get people in and out as fast as possible. So pre-clear dishes as soon as people are done eating which encourages them to leave and it makes the place look much less chaotic.

Summary

So what did you get out of this guide? I suggest you go back and read it a second time right now. You'll probably get a point or two that you didn't get the first time.


SECTION 8.7

MLK third-shift service

MLK location only: 812 N. Dr. M.L.K. Jr. Dr.

Take the business we can handle. Control the door. Follow the service tier.

This policy applies to 3rd shift employees working at George Webb Restaurant, 812 N. Dr. M.L.K. Jr. Dr.

This location is open 24 hours and has important late-night business from downtown customers, workers, hotel guests, convention visitors, delivery drivers, and regular customers. We want to take as much of that business as we can properly handle.

Because of late-night crowd control, staffing, and order-volume issues, this location uses service tiers on 3rd shift. The manager sets the service tier and door-control plan. Employees must follow the tier in effect.

Employees may not create their own service rules. Employees may not decide on their own to stop buzzing customers in when buzz-in carryout orders are allowed. If the tier allows carryout orders, carryout orders must be accepted.

Poor late-night service, refusing carryout orders, refusing to buzz customers in when required, or keeping customers out without proper reason causes lost sales, complaints, bad Google reviews, and damage to our business.

MLK 3rd shift service tiers are as follows:

  1. Tier 1 - Full Service: Dine-in service, walk-in carryout orders, online order carryouts, and 3rd party pickup/delivery orders. The front door is unlocked unless the manager sets a different door-control plan. This requires enough staff and the right conditions to handle the dining room, cashier station, kitchen, dishes, carryouts, and delivery orders. Tier 1 is not currently the normal 3rd shift service level at MLK unless the manager approves it.
  2. Tier 2 - Carryout-Only Service: Walk-in carryout orders, online order carryouts, and 3rd party pickup/delivery orders. No dine-in service. The door-control plan is set by the manager. If the door is locked and Tier 2 is in effect, employees must buzz customers in to place walk-in carryout orders at the cashier station or by handheld. Employees may not decide on their own to stop buzzing customers in. Food is packaged to go. Payment must be collected in advance. Restrooms are not available.
  3. Tier 3 - Online Pickup and Delivery Service: Online order carryouts and 3rd party pickup/delivery orders only. No dine-in service and no walk-in carryout orders, unless approved by the manager. The door-control plan is set by the manager. Pickup customers and delivery drivers may be buzzed in or handled at the door. This tier may be used only when staffing, order volume, or door control makes walk-in carryout ordering difficult to manage.

Service tier chart:

Service Level Dine-In Service Walk-In Carryout Orders Online Order Carryouts 3rd Party Pickup/Delivery Orders Door Control Restrooms
Tier 1
Full Service
✓ ✓ ✓ ✓ No Door Control ✓
Tier 2
Carryout-Only Service
X ✓ ✓ ✓ Door-control plan set by manager. If locked, customers are buzzed in to place walk-in carryout orders. X
Tier 3
Online Pickup and Delivery Service
X X
unless manager approves
✓ ✓ Door-control plan set by manager. Pickups/drivers may be buzzed in or handled at door. X

Door control under Tier 2:

  1. The manager sets the service tier and door-control plan.
  2. Sunday through Thursday, when two or more employees are on duty, the door is normally unlocked.
  3. Friday and Saturday, when only two employees are on duty, the door is locked/buzz-in because late-night crowds can become too much for two employees to control.
  4. Friday and Saturday, when three or four employees are on duty, the door is normally unlocked for the whole shift.
  5. A locked door under Tier 2 does not mean customers are turned away. Customers are still buzzed in to place walk-in carryout orders.
  6. Employees may not decide on their own to stop buzzing customers in.

Staffing and service guidelines:

  1. Tier 1 Full Service depends on the time of day, customer volume, employee ability, and manager approval. It is not based only on the number of employees.
  2. The main 3rd shift goal is Tier 2 Carryout-Only Service.
  3. With one employee on duty, the door may remain locked, but Tier 2 should still be used when the employee can reasonably handle buzz-in carryout orders.

When buzzing someone in, say:

"I can let you in to place a carryout order, but please do not let anyone else in behind you."

Do not tell customers things like:

  1. "We're not taking orders."
  2. "You can't come in."
  3. "We're only doing DoorDash."
  4. "We're not doing carryouts."
  5. "You have to order online."
  6. "We're too busy."
  7. "The cook is cleaning the grill."
  8. "We're changing shifts."
  9. "We already cashed out."

These comments push customers away, cost us sales, and create bad customer experiences.

If dine-in service is closed, say: "I'm sorry, but this location is carryout only overnight. You are welcome to place an order, and we will package it to go."

Restrooms are not available during restricted overnight service unless dine-in service is open or the manager gives a specific instruction otherwise.

Employees must stay calm and professional. Do not argue, insult customers, raise your voice, physically confront anyone, or escalate the situation.

By signing this training, I acknowledge that I have read and understand this policy. I understand that I must follow the service tier and door-control plan set by the manager, control the door when the door is locked, take approved carryout orders, and not create my own service rules. I understand that violating this policy may result in discipline, up to and including discharge.